Results: Seed Color/Shape Viability Test
By Ben Morris / Head Breeder, Dirty Bird Genetics
To test whether a seed’s size, color and/or shape influences its ability to germinate, we tested 50 seeds of various sizes, colors, and shapes. All seeds were placed in distilled water and separated into five solocup shot glasses based on their size, shape, and color. We germ-tested 10 seeds in each of the following five categories: Large-Dark, Small-Dark, Large-White, Small-White, and Dark-Odd Shaped (meaning not elliptic as most cannabis seeds are). All seeds were stored in their respective shot glasses, placed in a box together, and left in an environment with low to no light, minimal air flow, approximately 60% ambient relative humidity, and at a temperature of approximately 75 degrees Fahrenheit. The seeds were observed on day 3, day 5, and day 8 to determine germination rates and progress.
Disclaimer: As a disclaimer, I would like to state that this was a preliminary test of seed viability with a very small population size. For conclusions that are statistically significant, more testing will need to occur with larger population sizes. This is by no means a definitive test of seed viability but rather a preliminary inquiry into this issue. This test was mainly to show that seeds with lighter colored to white seed coats, as well as abnormally shaped seeds, and smaller seeds can still be viable.
Day 1:

The 10 seeds of each category are laid out before being placed in germinating cups.

From Left to Right: Odd Shaped, Small-White, Large-White, Small-Dark, Large-Dark.
The 10 seeds of each category in the germinating cups as seen from above.
Day 3 Germination Results:

After 3 days the seeds were laid out on a background for observation of germination progress. The images below show the results found. The white seeds from both the small and the large categories turned a darker color after 3 days in the water in the cups, but these are the same seeds of those categories as shown in the first image of all the seeds in this study.

The Large-Dark seeds showed 8/10 seeds with the radicle exposed after 3 days.

The Small-Dark seeds showed 10/10 seeds with the radicle exposed after 3 days. The lesser amount of seed coat on the Small-Dark seeds may have allowed faster imbibition (taking up of water by the seed).

The Large-White seeds showed 7/10 with exposed radicles after 3 days.

The Small-White seeds showed 2/10 with exposed radicles after 3 days.

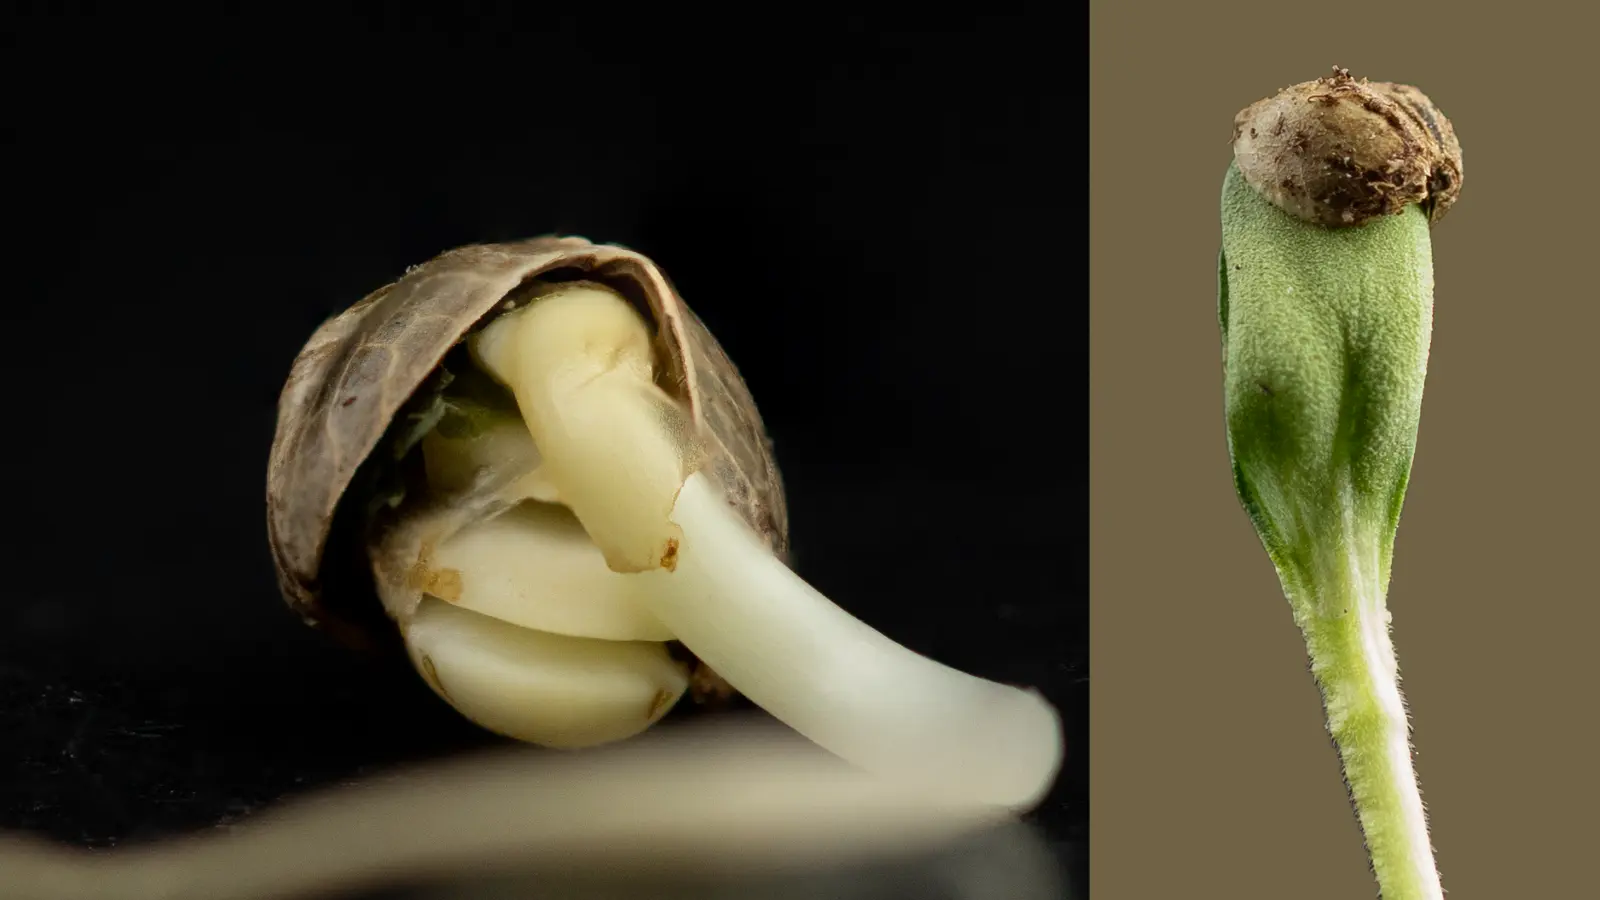
The Odd-Shaped seeds showed all 10/10 radicles exposed after 3 days. One seed appears to have 2 radicles coming from a single seed coat. This is most likely due to 2 zygotes forming within the plant ovary very shortly after pollination or due to 2 seeds fusing as they formed.
Day 5 Germination Results:

After another few days in the dark and in the distilled water the seeds were again taken out and observed. Below are images of the results on day 5 of this experiment.

All 10/10 Large-Dark seeds are now showing exposed radicles after 5 days.

All 10/10 Small-Dark seeds continue to show exposed radicles after 5 days.

Large-White seeds are showing 7/10 exposed radicles after 5 days.

Although difficult to see, 3/10 Small-White seeds are now showing exposed radicles after 5 days.

After 5 days, 10/10 Odd-Shaped seeds are still showing exposed radicles. One of the “twin” radicles broke off of one of the Odd-Shaped seeds. The first seed all the way to the left of the image does have an exposed radicle but its slightly darker color makes it difficult to see. Once zoomed in, anyone can see that a small, discolored radicle is exposed.
Day 8 Germination Results:

After 8 days total the seeds were observed for a final time to see the results pictured below.

After 8 days, 10/10 Large-Dark seeds show exposed radicles.

After 8 days 10/10 Small-Dark seeds show exposed radicles and 3/10 even show cotyledon.

After 8 days 7/10 Large-White seeds showed exposed radicles.

After 8 days 3/10 Small-White seeds showed exposed radicles.

All 10/10 Odd-Shaped seeds are still showing exposed radicles after 8 days.
RESULTS:

Preliminary Conclusion:
- Many shapes, colors and sizes of seeds can be viable.
- Dark seeds have the best germination rates, regardless of whether they are small or large.
- White seeds are significantly more viable if they are larger. Small white seeds performed poorly in this germination test.
- Seed shape has no affect on viability.
- Using our germination method, seed viability was determined and unchanged by Day 5.
Based on the limited results of this preliminary study, many shapes/colors/sizes of seeds can still be viable. They don’t all have to be large and dark colored although having a dark colored seed coat does seem to have a positive correlation with germination viability. It also seems that a larger seed may have a better chance of germinating as seen in the results between the Large-White and Small-White seeds with the Large-White having a 70% germination rate and the Small-White only having a 30% germination rate. From the limited results of this simple experiment, it appears that seed shape didn’t affect germination rates with the Odd-Shaped seeds having 100% germination just like the seeds in the Large-Dark and Small-Dark categories.
One parameter not reflected in these results is the pressure with which you can apply to a seed to test viability. Lightly (very lightly) pinching a seed between your thumb and pointer finger and seeing if the seed deflates or pops can be a relatively reliable method of determining germination viability. Just a light pressure should give the kinetic feedback to know that the seed is “solid” and probably will germinate or will deflate/pop the seed and thus that seed was not viable. One thing many people seem to do is apply too much pressure to seeds when they check in this way. Again, light pressure is all that is required. One does not need to squeeze as hard as they can as this can give false results since enough pressure can pop any seed regardless of viability.
For more info on how we germinate, please see our Germination Guide here.
As Always, Happy Growing!