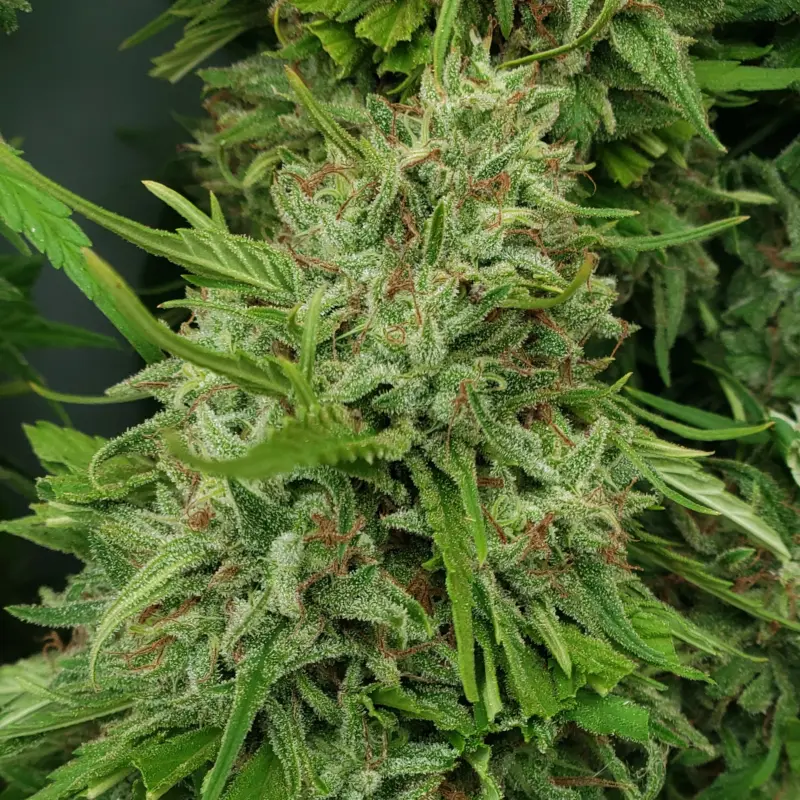
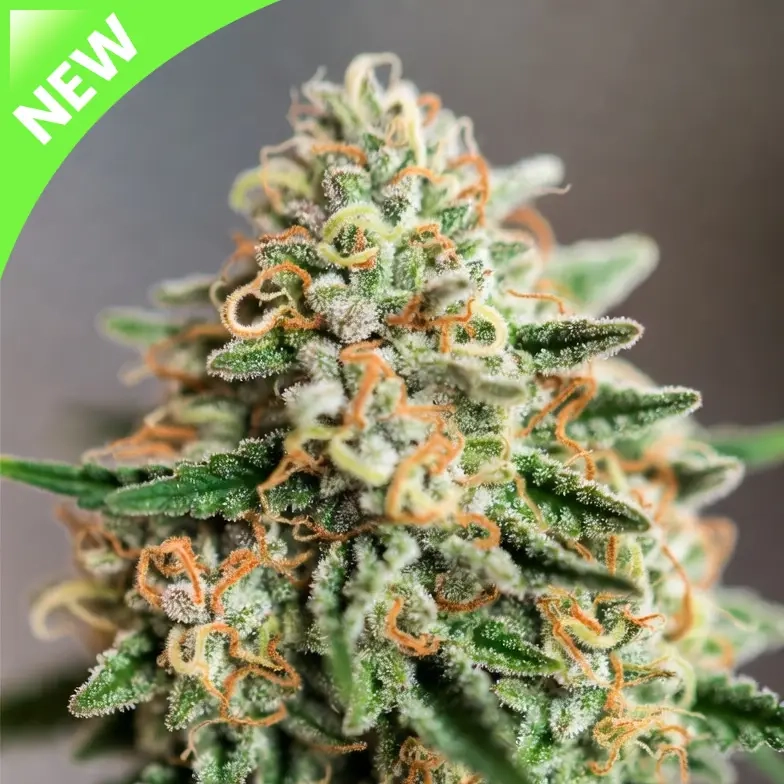
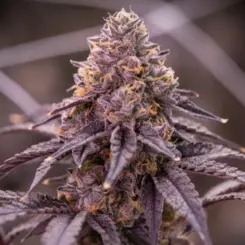
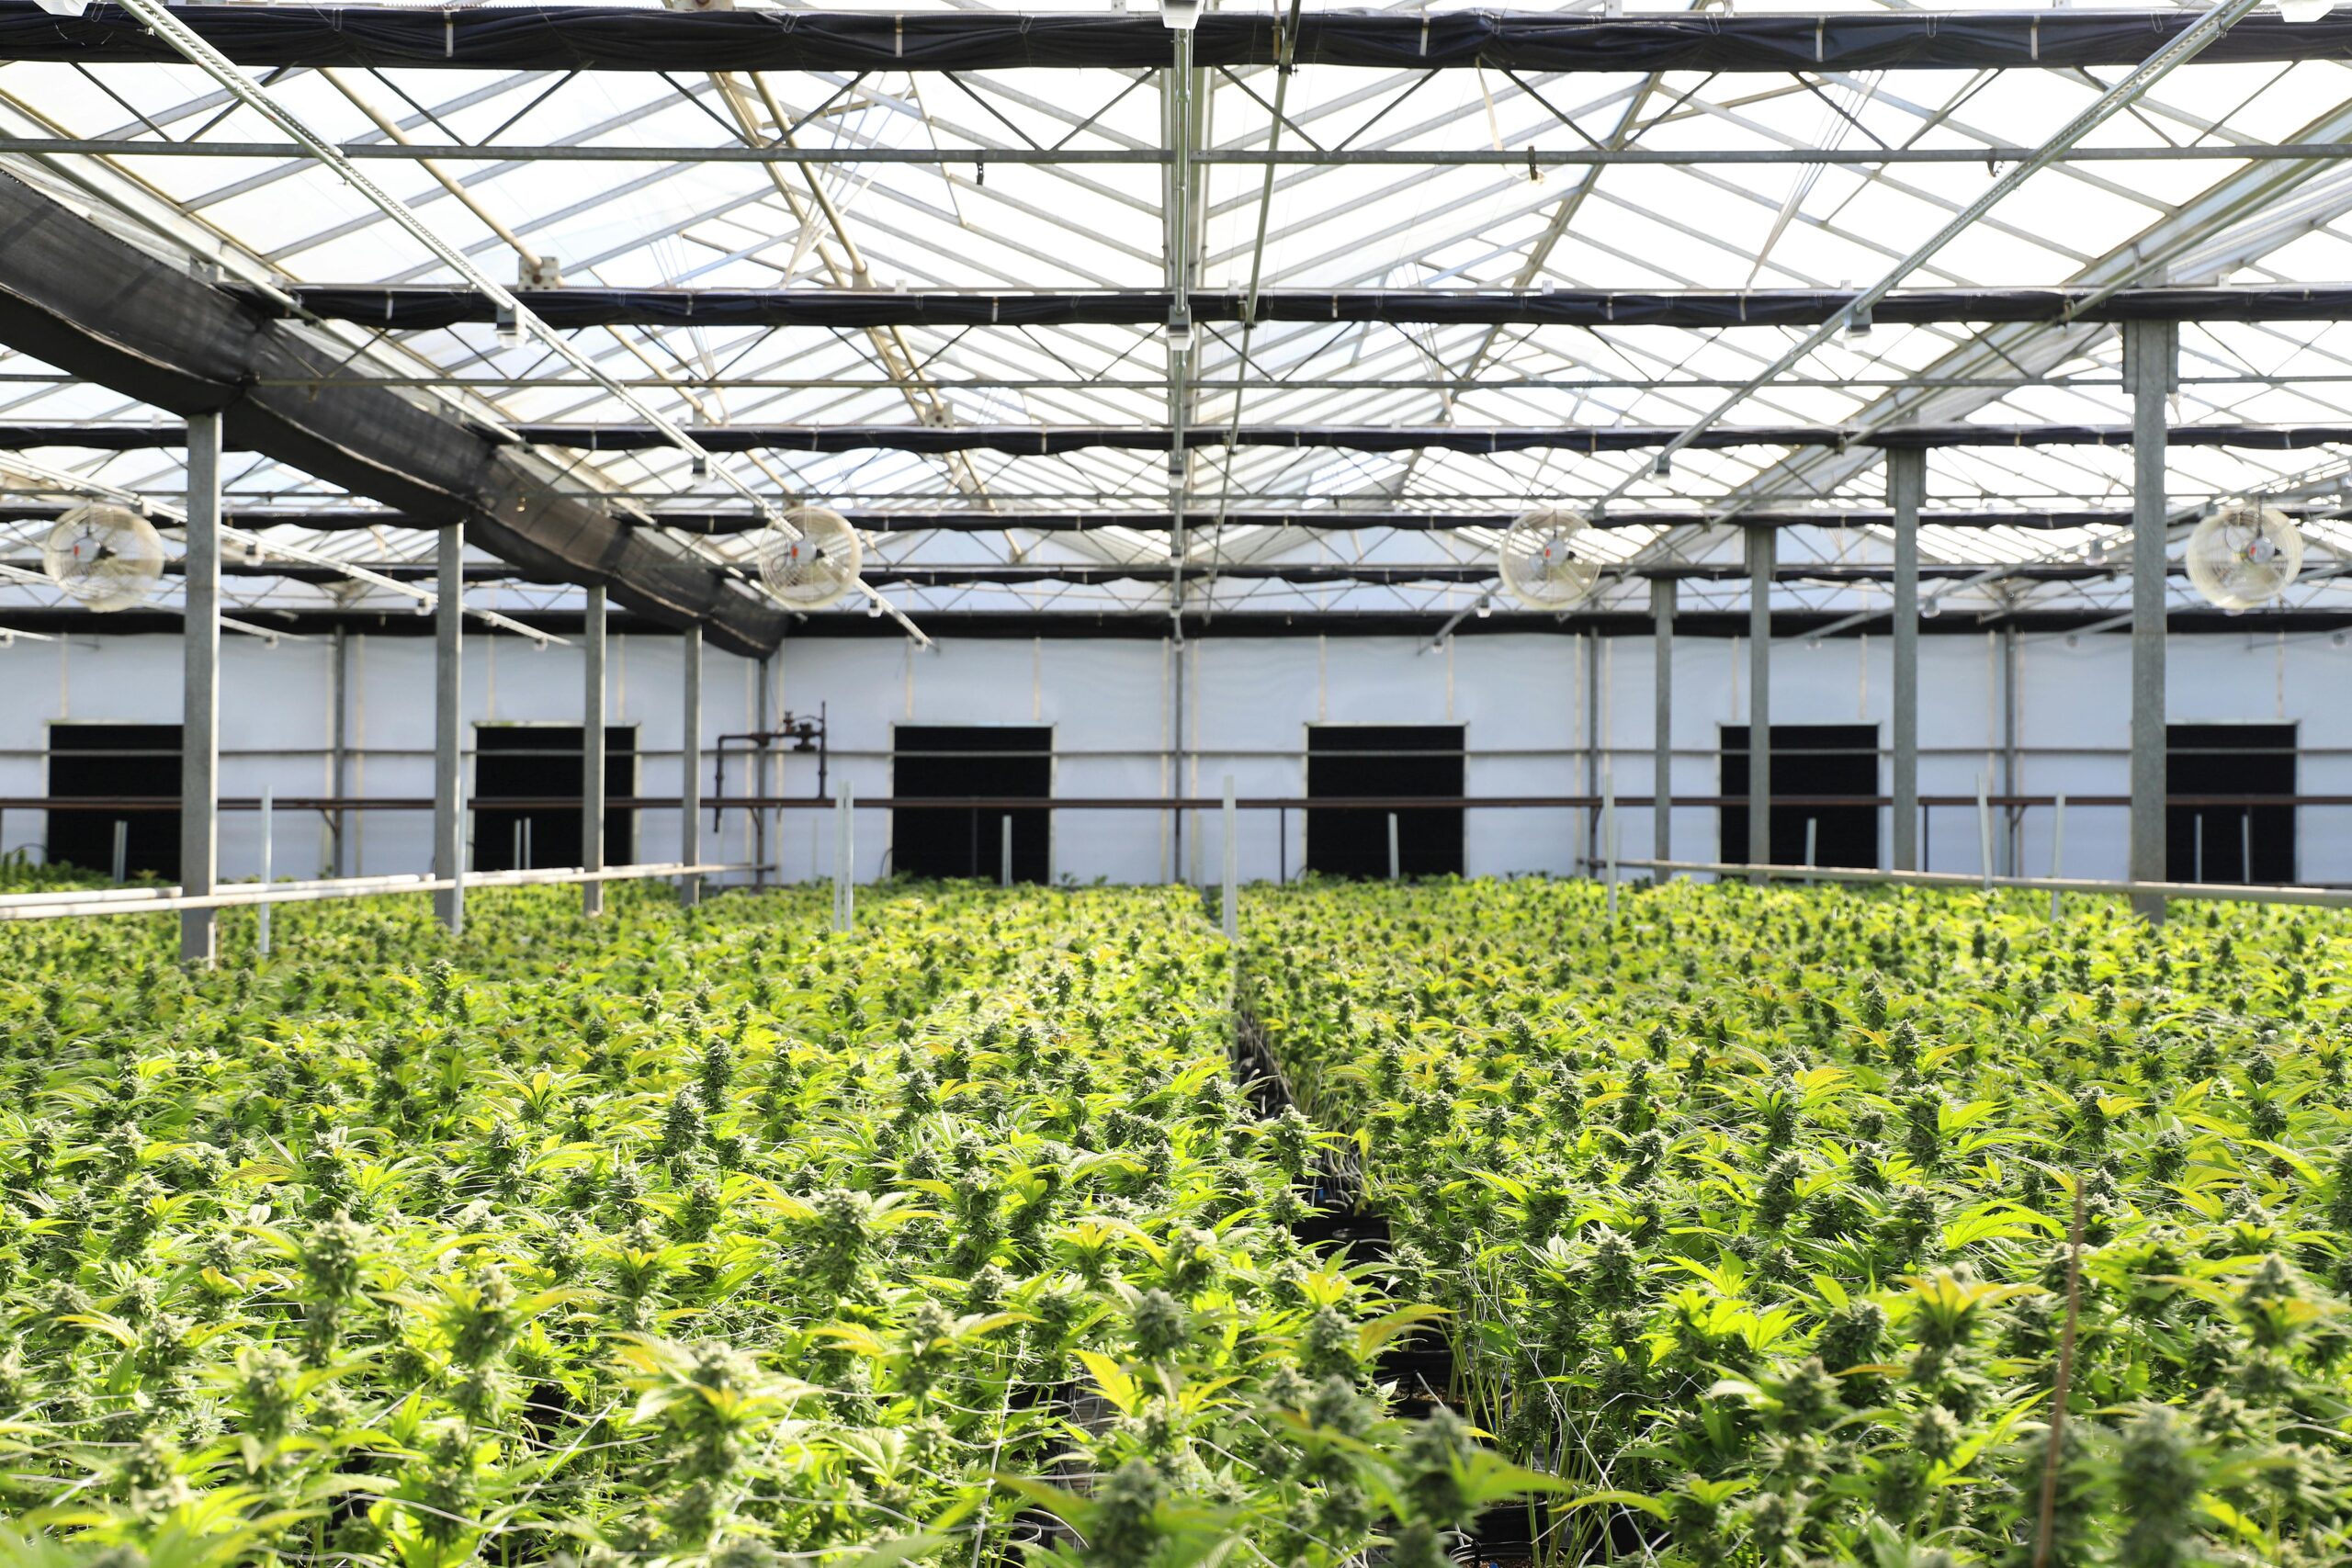
Jolly Pond Farm shares 3 tips for new growers, and more! Don't miss out on all the great deals from Jolly Pond Farm for Breeder of the Week!
3 Tips For New Growers
Master the Dry-Back Learn how to properly push your plants to dry back. Watch them closely as they go near bone-dry and just start to droop, then water them and see how they bounce back. Over-watering is often the root cause of a grower's misery. Experiment constantly so you can witness that cause-and-effect firsthand.
Prep Your Outdoor Soil Deeply If you're growing outdoors, loosen your soil. We love growing in native ground, but it requires disturbance first. Use a broadfork, pitchfork, subsoiler, or plow—something to get deep down. Test your soil, amend it, and get that top layer loose, whether you're using fresh-tilled native ground or your favorite fluffy bagged mix.
Cover Your Soil Off-Season Keep your soil covered when you aren’t actively growing. Our preferred method is using silage tarps on plots that aren’t in use. If a plot is underperforming, we will use cover crops, but tarps remain our go-to. Pulling back a tarp makes working with fresh ground incredibly easy. From there, test and amend—we use local worm castings and forest floor material from our own woods—and add specific inputs only for major imbalances when needed.
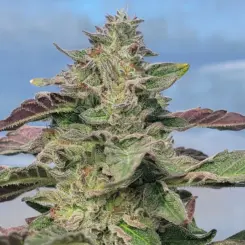
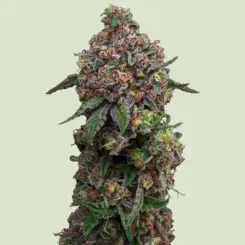
Favorite Breeding Project
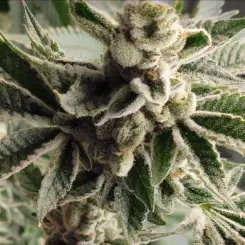
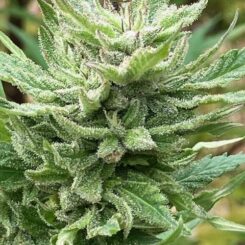
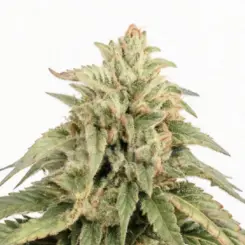
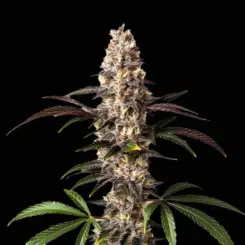
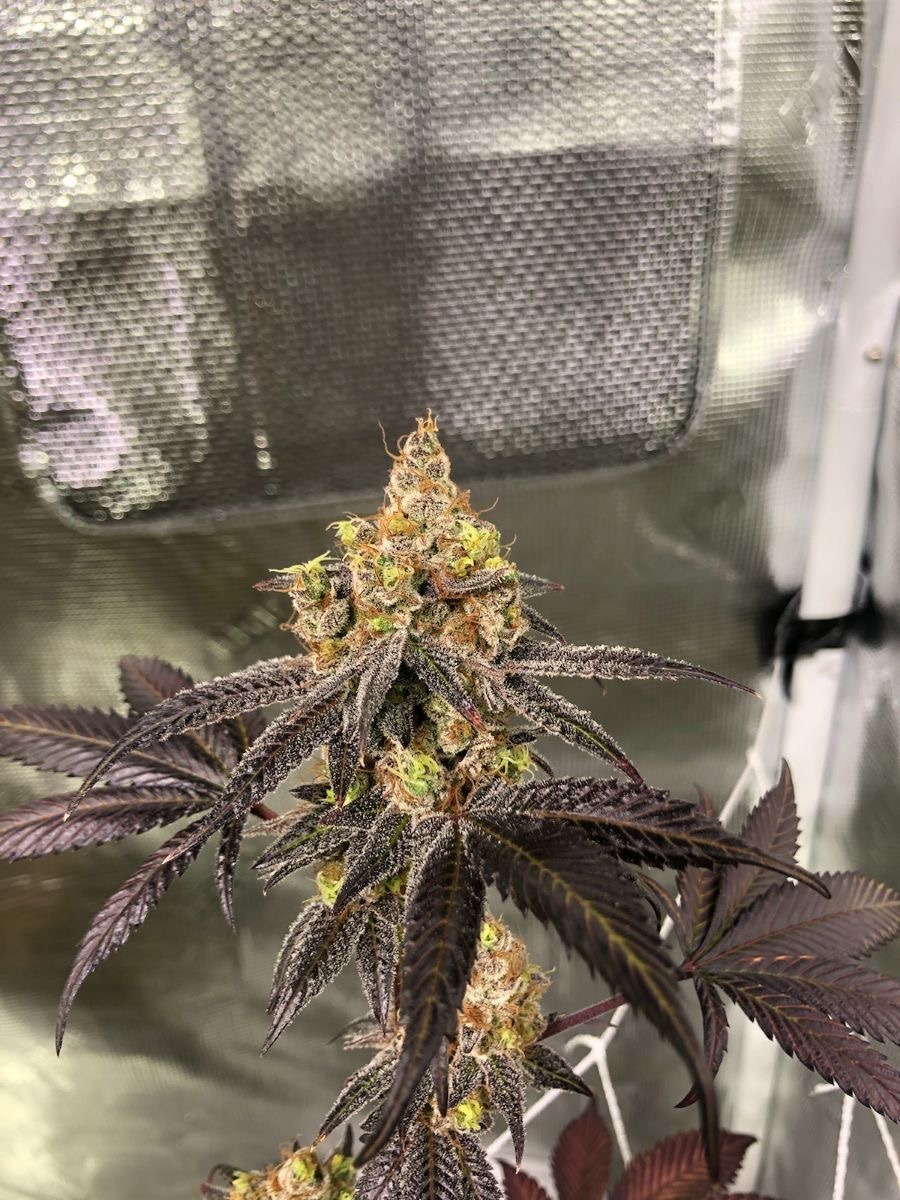
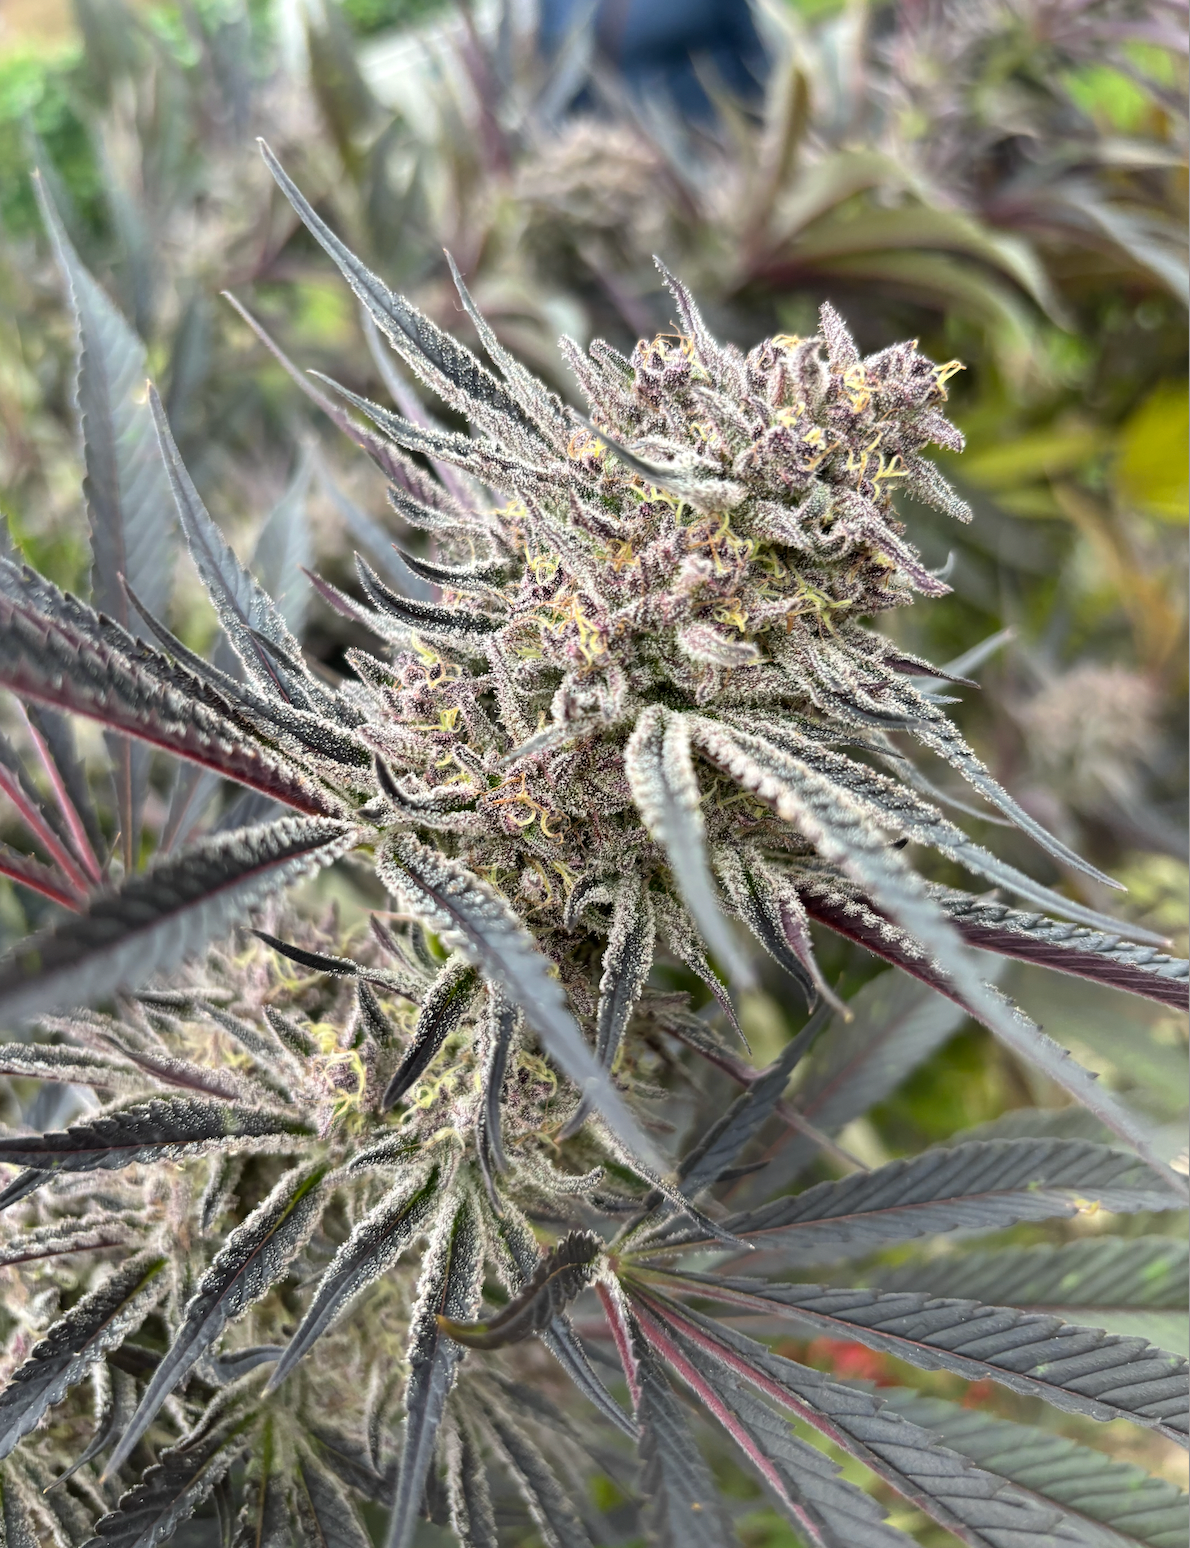
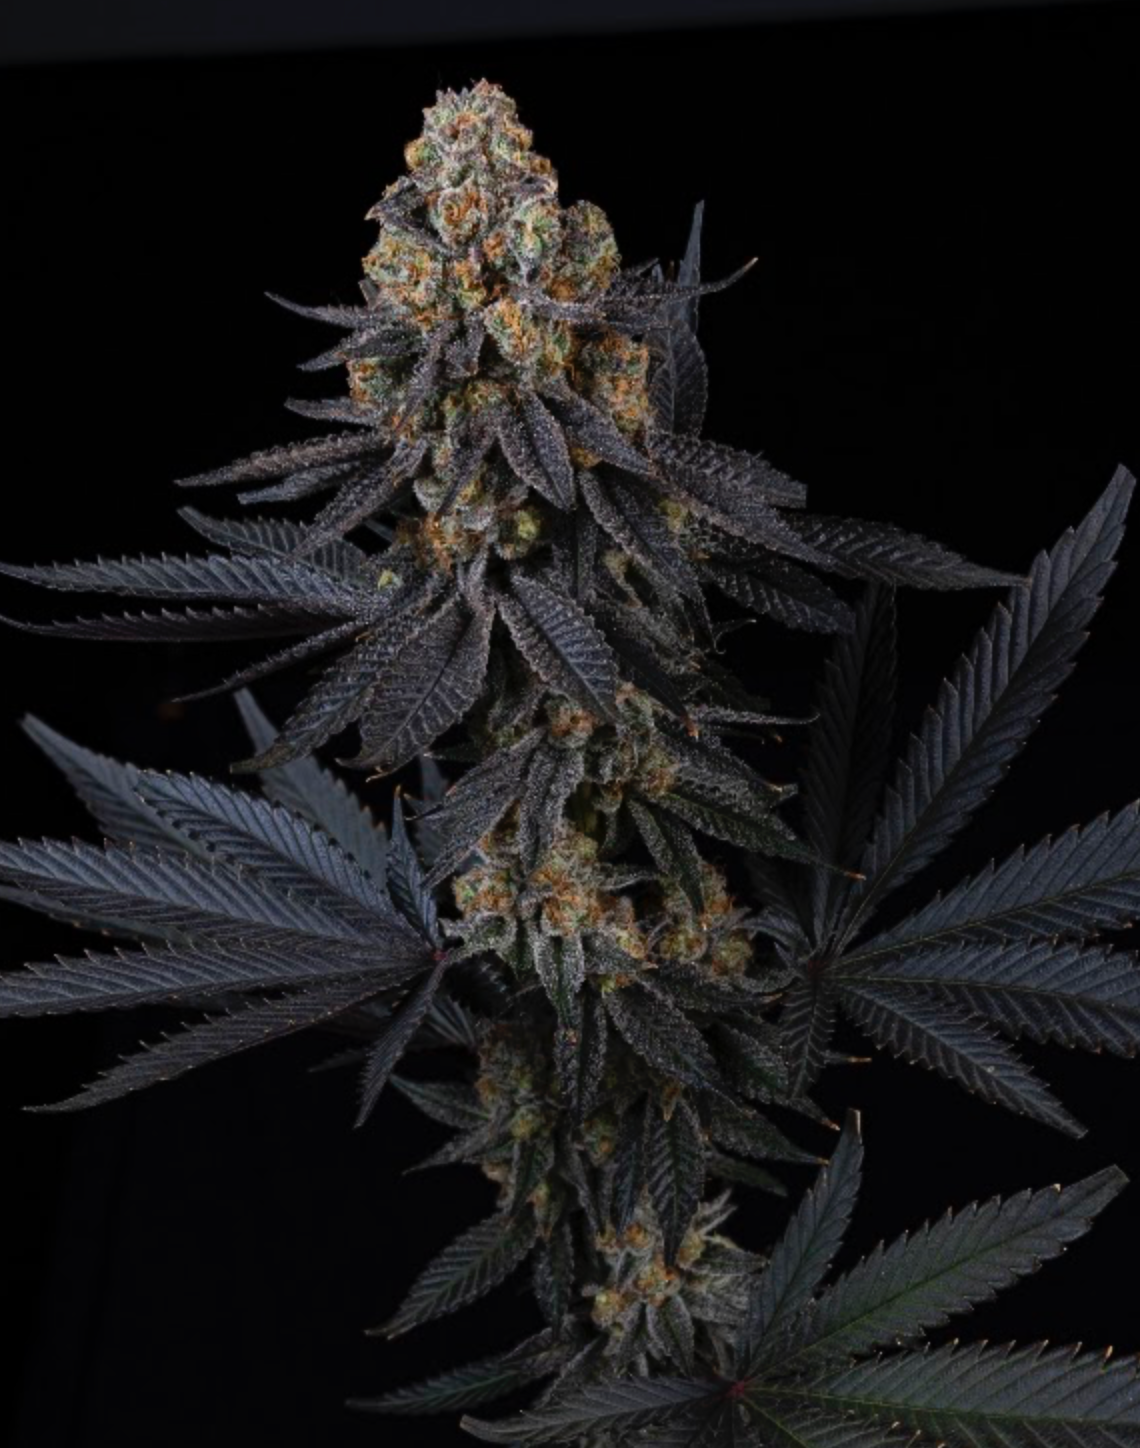
Working down the lines with White Afghani has been a true labor of love over the years. We’ve been chasing loud, Lemon Pine-Sol aromas with a heavy citrus taste to match. We actually found that exact aroma years ago during our first hunt with our White Afghani selection, but the flavor just wasn't where we wanted it. We took that to F3 in regular seed and then outcrossed it to several lines.
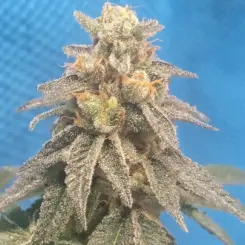
The one that brought the massive flavor we were looking for was a Trop Cherry cross, which we named Tropighani. It unlocked some of the most unique flavor profiles we’ve ever experienced. In fact, our Tropighani #218 selection took 1st Place in the Outdoor Category at the Michigan Sungrown last year in 2025. It carried that Lemon Pine-Sol Afghani nose we love, but packed a wild, off-the-charts tropical citrus flavor that was unique enough to get recognized at an elite level.
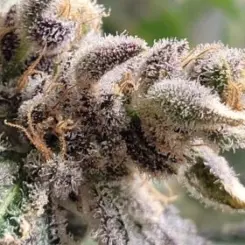
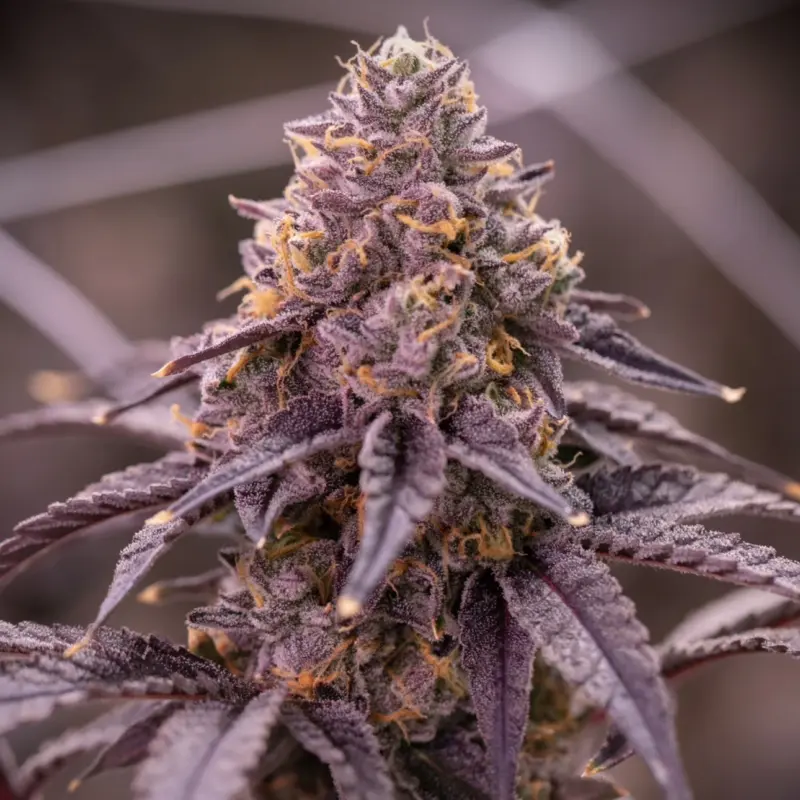
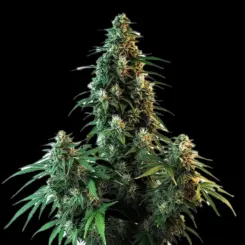
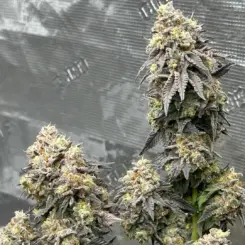
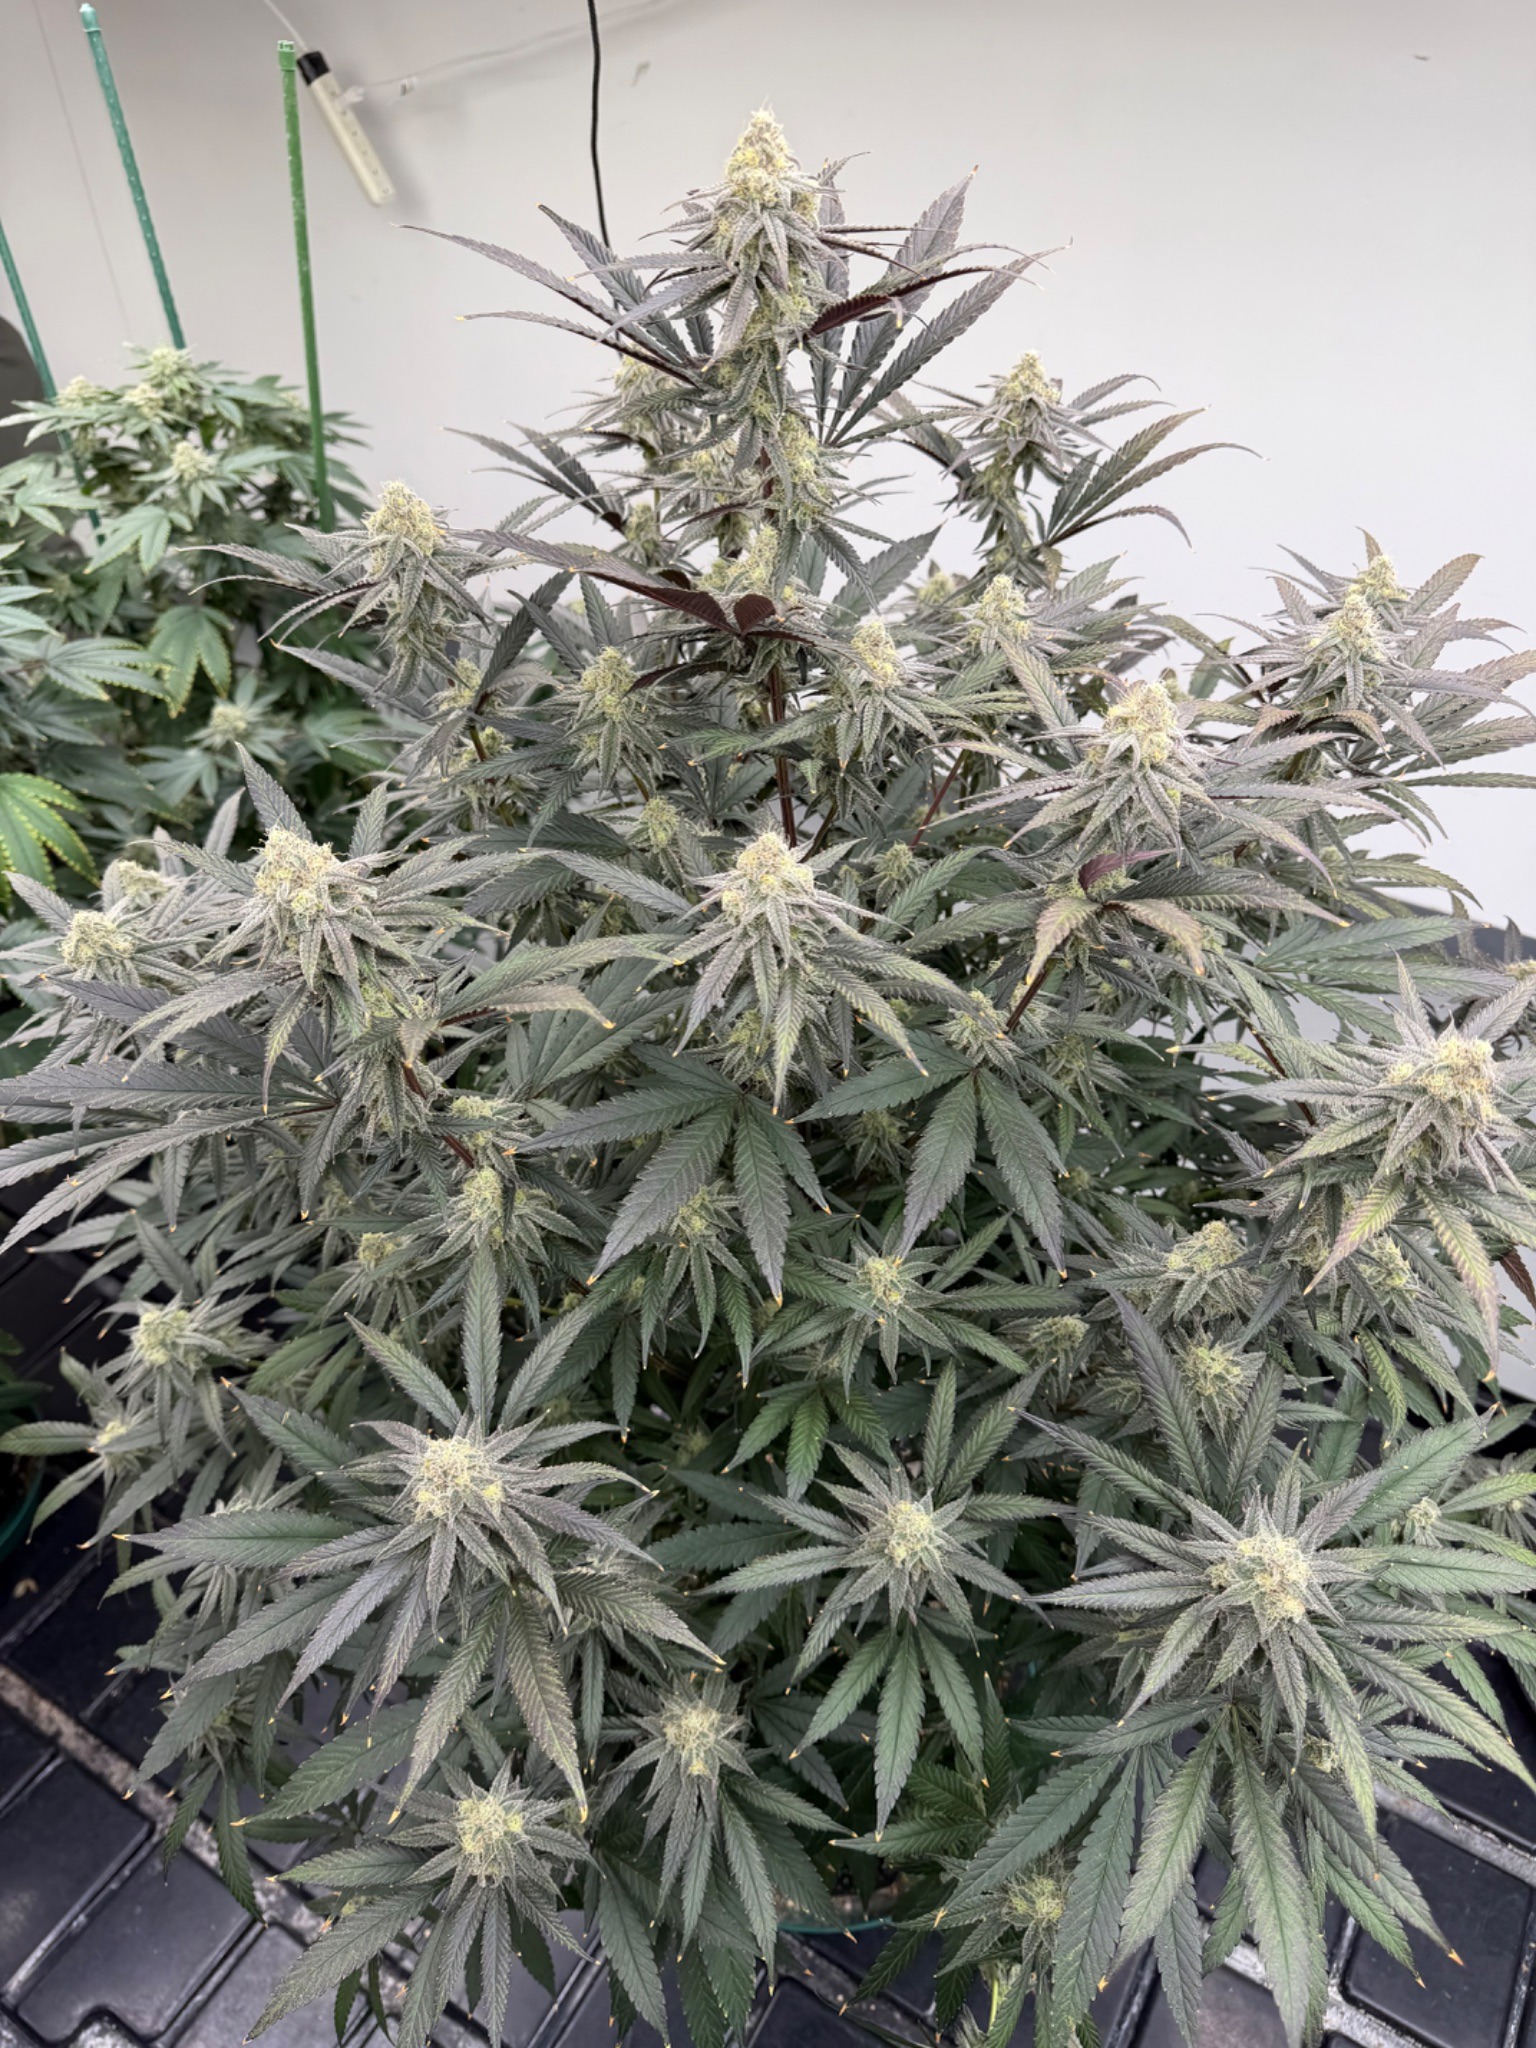
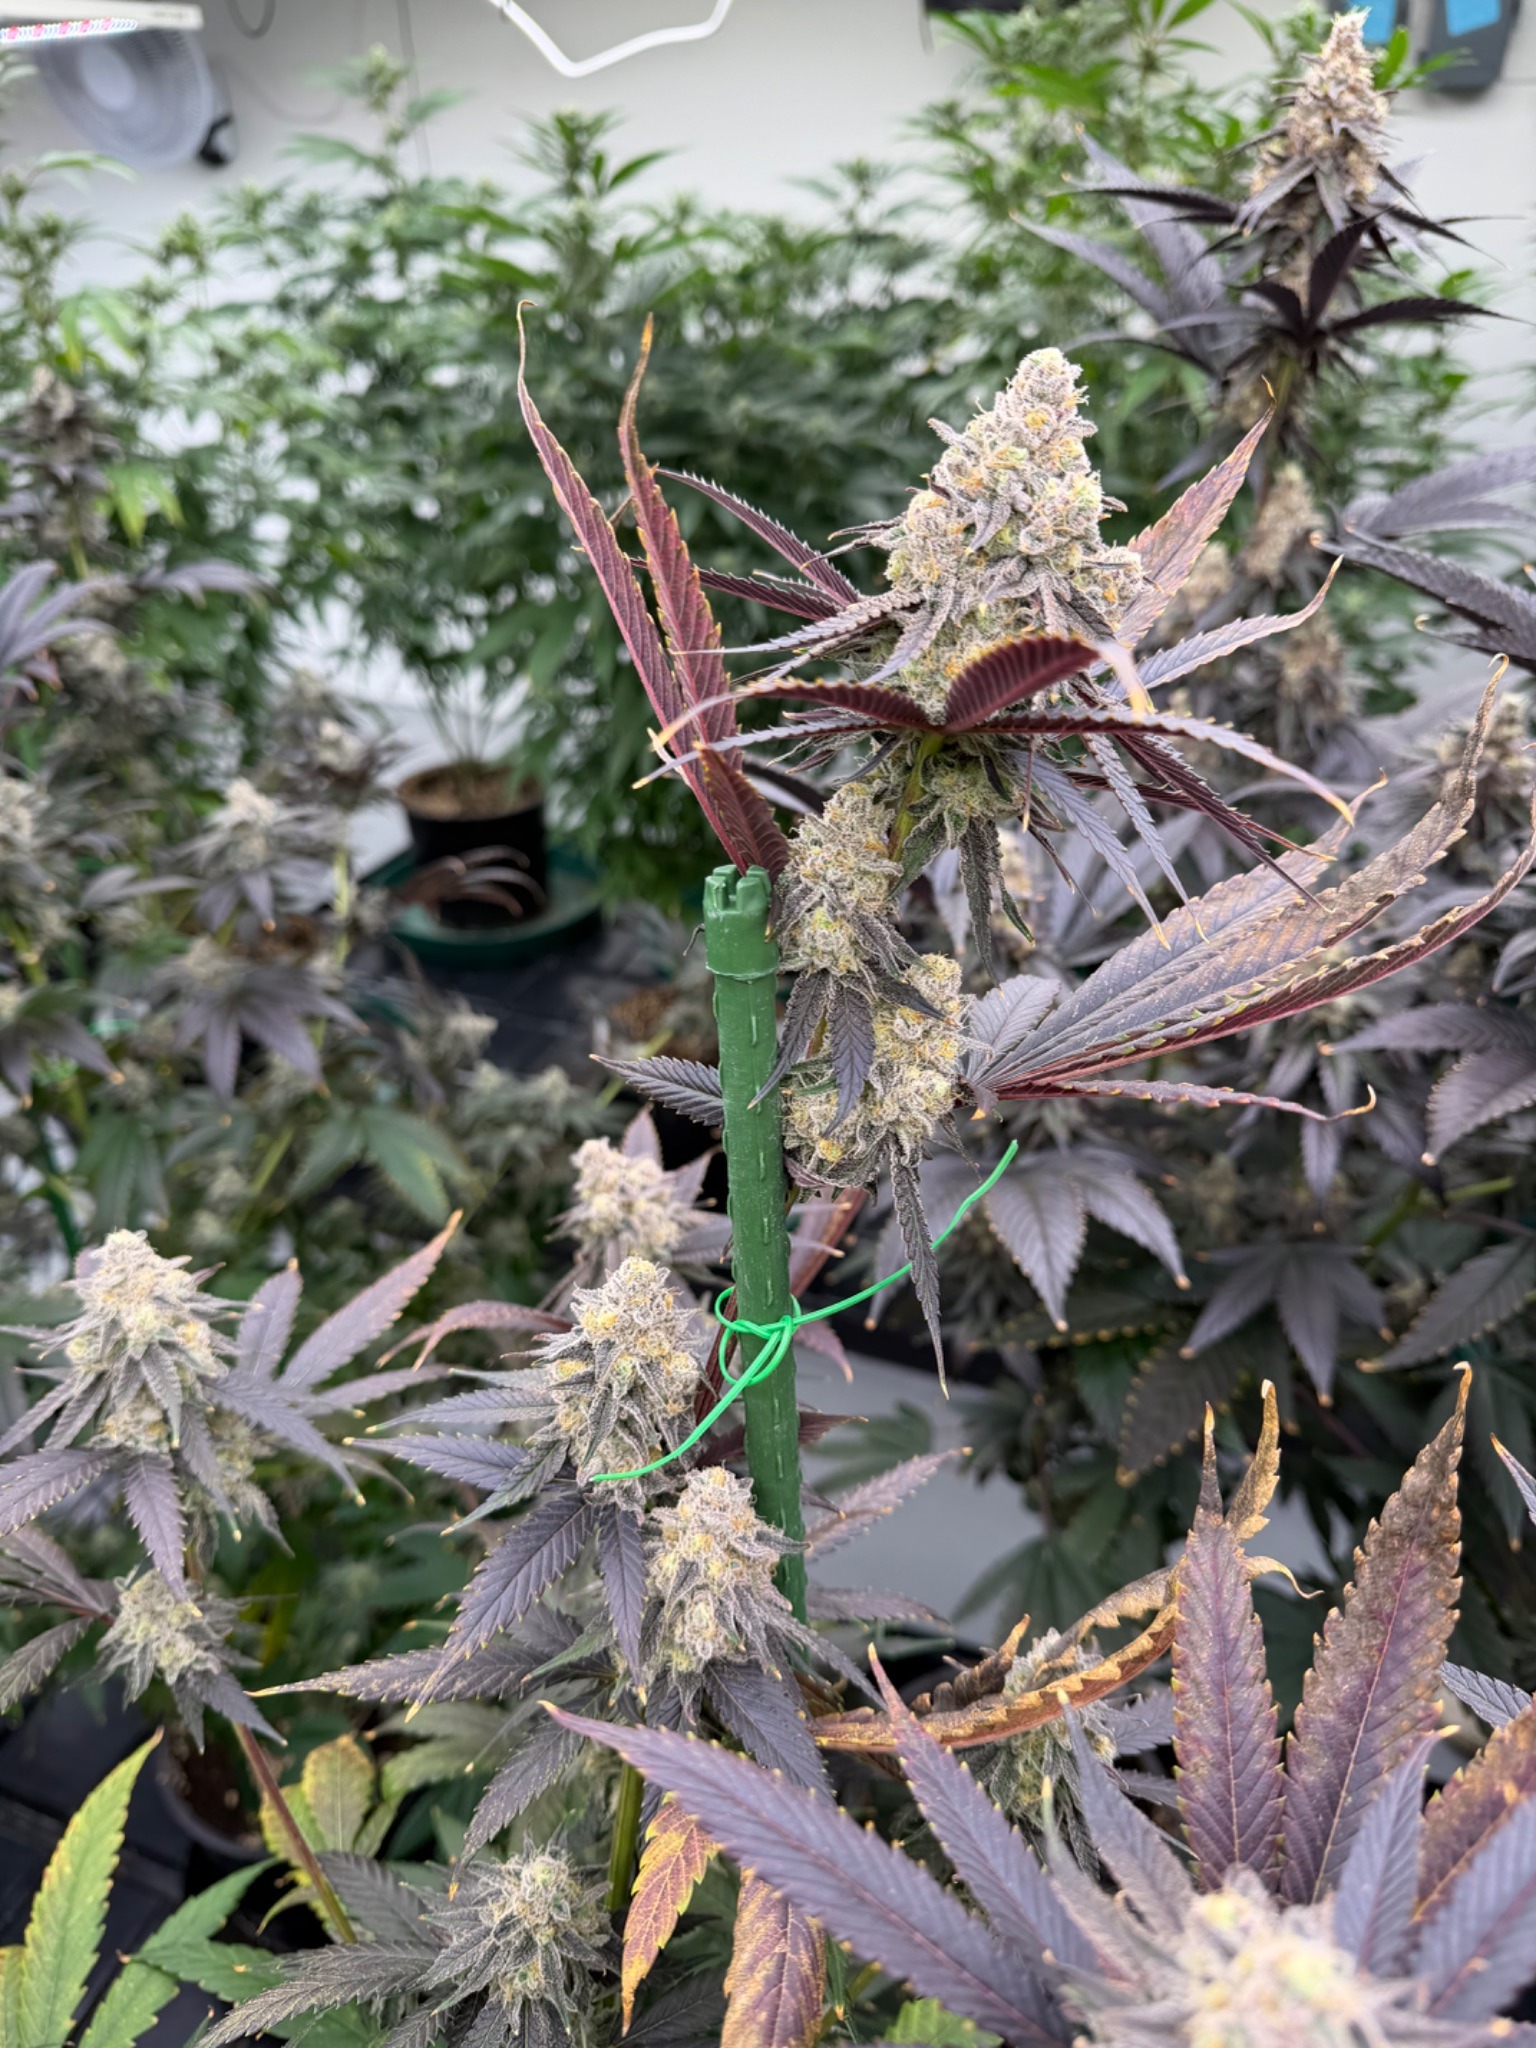
From there, we crossed that #218 selection to a few things. First up was Tropighani 218 X Blue Ridge OG, which we call Tropical Desert Storm. We ran the indoor testing this past winter—zero issues, massive flavor profiles, insane washers, and total lookers. We finally found the exact flavor profile we’ve been hunting for over the last 7 years. We got her re-vegged, and testing continues.
But breeding is a roller coaster. We popped more seeds to look deeper into the line and hit a wall: 50% of them hermed outside. It takes countless years of selection to get these plants to stand up to the elements. Fortunately, we always run in multiple directions. At the same time, we've been working on a Blue Ridge OG backcross to our F1 White Afghani, chasing that same goal. But surprise, surprise—the most promising results across all projects have come from the introduction of the Trop. We love our OGs and are going to continue working both sides of the fence, chasing loud OG genetics with massive flavor that absolutely crushes the East Coast outdoors.
Story from the Garden
A long time ago, I was out picking raspberries and my dog, Snarf, wouldn’t leave my side. She kept trying to eat every single berry right out of my hand until I just gave up and started picking them directly for her. She wouldn’t dare try to harvest them herself because of the thorns!
Later on, you could find her browsing the pepper patch all the time on her own, picking out the best, most ripe sweet peppers available—though every now and then, you’d watch her accidentally destroy a hot one, too. Those were her two favorite things to harvest. In her downtime, she’d always find a cannabis plant to curl up and lay under.
Her memory lives on every single year out on our pond with our floating dock. We started the tradition with Snarf’s Marmalade three years ago, and we make a new cross featuring her genetics every year to set sail on the dock. The plant wicks water right up from the pond, floating freely and dancing with the wind.
Beginner Friendly: White Afghani, Muffins Ridge, Mountain Jelly, White Marmalade
Short Flowering Time (under 8 weeks): White Afghani, Falooda, Mikado X Jokerz
Resistance to Disease: White Afghani crosses and Limetta Marmalade Crosses, almost everything except the Mikado X Jokerz and Jokerz Marmalade are a bit tough outside.
High Yield: White Afghani, Limetta Marmalades, White Marmalade, Falooda
High Test (THC): Garlic Grove Crosses, Blue Ridge OG Crosses, S1 White Afghani, S1 Jokerz
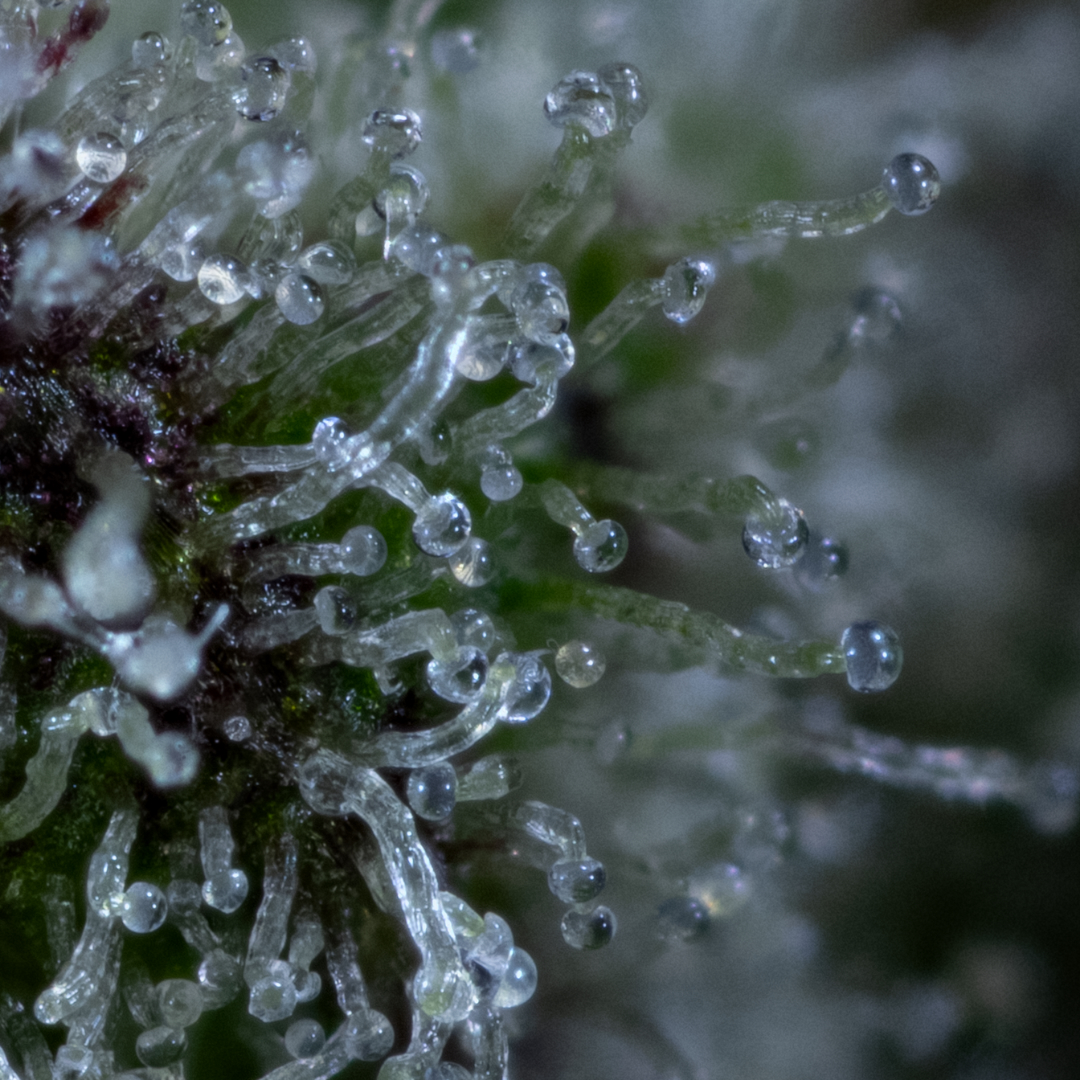
Terpene Heavy: White Afghani, S1 Limetta Marmalade, White Marmalade, Cottonmouth Colleen, Chiroptera Marmalade, Garlic Bog V2, Snarfs Marmalade
Extracts: Tropighani, White Warshed, Washout Marmalade, GMO X Jokerz
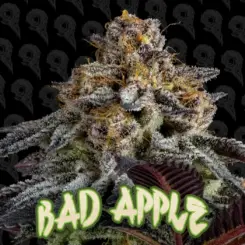
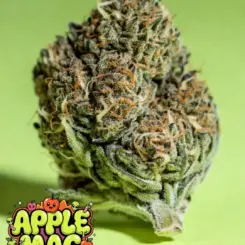
Our next sesh was with Candy Apple Kush, part of Volume 4 by Dirty Bird Genetics. She is a cross of Luna's Wrath x Bad Apple [Sugar Mill Cut]. Read on to learn about our experiences.
Right off the bat, there is splendid bag appeal with healthy nugs of greens and purple. I can smell and taste an apple-like sweetness with moments of citrus and an occasional musky funk. It was a smooth smoke overall. The start of the high had me feeling goofy and sharing laughs with my better half. After the peak silliness subsided, I started to fade. The comedown was very calming and soothing, but there was no room for activity. This one put me to sleep at a decent hour so I would definitely save this strain for the night-time wind down sesh. This one is for you if you prefer indicas or need a little help catching the Z’s.
- Crystal
Candy Apple Kush is perfect in the evening to unwind after a busy day. It really knocks you into a state of deep relaxation and makes you forget your troubles. It’s great for zoning out and watching a good movie before going to sleep. I would not smoke this early in the day since it does tend make you sleepy. Its name really suits it because when you open the bag, it actually smells like apples and candy. The buds are sugary and dense, and it grinds and burns really well. It definitely made me want to eat a snack and get cozy. I’d recommend for insomnia and anxiety as well!
- Mariah
Read more about the differences between Alpha Series, Limited Series, & Tester packs.
Keep things simple. Most mistakes happen when you overwater, overfeed, or constantly tweak your setup. Let the plant do its thing, check on it daily, and give it time to respond before making changes.
Don’t harvest by the calendar alone. Flowering times are a great general guide, but every setup and outdoor climate is slightly different. Instead of chopping strictly because a set number of weeks have passed, get a cheap jeweller's loupe and check the trichomes.
Be patient with drying and curing. It’s tempting to rush right after harvest, but if you don't give your flowers a proper slow dry and cure, you'll burn off the terpenes and flavour you just spent months working for.
Favorite Breeding Project
My personal favorite projects (being a Halloween baby) have been our limited Halloween drops like Cereal Killer and Scream Cheese. We really enjoy doing these limited runs because they let us step away from our main catalogue of sweet, dessert-heavy strains and lean into potent cheese, and old-school, nostalgic terps, with the one-off dark aesthetics to match.
Story From The Garden
When we were finalizing our Cookie Dawg line, we were torn between two phenos: one with a more peppery kush gas, and another with a peanut-butter-dough smell. We’d been debating over which one to keep, and during an evening smoke sesh, we joked out loud that we needed a sign from the universe. Moments after, our cocker spaniel trotted in, ignored the gassy jar, shoved his nose in the peanut-butter pheno, and sat down next to it wagging his tail like he wanted a biscuit. We went with that exact pheno, and putting his photo on the sticker was a no-brainer since he basically made the final decision for us.
Strain Recommendations & Genetic Highlights
For outdoor, I would recommend: Blueberry Octane Auto (NEW — Champagne Octane × Blueberry Kush Auto). Built for unpredictable weather, it inherits an old-school Blueberry structure with thick foliage that handles humidity and temperature swings. It finishes fast in 8 to 9 weeks to beat late-season mould, while its heavy myrcene and pinene terps naturally deter garden pests.
For beginners, we’d recommend: Lemon Runtz Auto (NEW — Lemon Venom × Black Runtz Auto). It features a robust, forgiving structure that easily handles nutrient bumps without stressing out. As a fast 8-to-9 week auto requiring zero light-cycle management, it gives newcomers an easy, low-maintenance run while stacking loud, sugary lemon buds.
For flowering time under 8 weeks, we’d recommend: Hash Cake Fem (Critical × Wedding Cake). This photoperiod powers through a fast 6-to-8 week bloom cycle. It inherits famous Wedding Cake performance—packing on dense, rock-hard buds and heavy frost—while layering rich vanilla dough with earthy pine and deep kush notes for a great sweet-and-savoury contrast.
Gorilla Gas Auto (Chemdawg × GSC × GG4 Auto) was selected for its naturally resilient genetic profile. Developed for durability, it grows thick branching to support heavy flowers and features a high bud-to-leaf ratio for quick trimming. Loaded with caryophyllene and limonene, it has strong natural defences against environmental stress while pumping out peppery lemon-diesel gas.
Cookie Dawg (Peanut Butter Cookies × Kosher Dawg) was selected for high yield thanks to its rapid growth and heavy flower stacking. Strong lateral branches hold serious weight, making it a reliable pick for big harvests paired with nutty peanut butter and kush fuel.
Best high-THC choice would be: Back to the Future Fem (Original Glue × Alien Tahoe OG). It sits at a heavy 30% THC on the spec sheet, but it’s the synergy with the terpenes that makes it hit so hard. Earthy myrcene and peppery caryophyllene drive the entourage effect, delivering a deep body stone perfect for physical pain relief, muscle aches, and evening relaxation.
Sour Sherb Pop Fem (NEW — Pink Apple Soda × Sour Sherbet) is our top terpene-heavy choice for its loud, punchy flavour. It mixes crisp apple soda with sharp sour sherbet, giving you an intense, tangy, and refreshing sweet-and-sour profile that coats the mouth.
For extraction, we’d recommend: Rainbow Grease Fem (NEW — RS11 × Grease Monkey). Grease Monkey is famous for dumping greasy resin heads. Crossed with the sweet tropical fruit of RS11, this cross is a dream for washing and extraction, delivering great yields and loud candy terps.
Romulan Genetics shares 3 tips for new growers, and more! Don't miss out on all the great deals from Romulan Genetics for Breeder of the Week!
3 Tips For New Growers
The best tip I can give any new grower is to enjoy the process. It is amazing how much you can learn about yourself, while learning how to care for and grow plants to their full potential. Take each failure in stride, and learn from mistakes that inevitably will come.
Another tip would be to reach out to others for help. Join grow communities like online forums, sites like discord, etc.. There are lots of places to get help!
And my 3rd tip would be to grow as many seeds as you can from different breeders and seed companies out there. You will eventually find people who make things that are perfect for you and for what you enjoy about Cannabis. Seeds and genetics can be like music, so find your favorite artists!
Favorite Breeding Project
My favorite breeding project has been my decade long quest of making Romulan seeds available again to anyone across the globe. Over the years I have made hundreds of different crosses using Romulan as one of the parents, and from those creations I have released almost 50 different Romulan cross strains since 2019. Those seeds have been grown all over the world, and I have heard from so many people how it has helped to better their lives just like it helped me personally years ago, and still is to this day. Breeding with Romulan, almost exclusively for so long, has helped to not only teach me about the deeper complexities of breeding with Cannabis but it has also helped to shape my future projects and where I want to take people on this journey with me. It has been the most exciting and stressful project that I have ever set off on in my life. And now that I am finally on the final steps of that journey, I am very excited to put my new work out into the world. This July I am dropping the first cross of many that will not involve Romulan as a parent, or root genetic, in the strains. The testers who help grow these creations out before release have all been talking about how good everything is, and I am just super proud of this new era of my breeding and I cannot wait to hear from customers and growers after they have grown it themselves. But I will always look back on the Romulan breeding era as a time that taught me everything I know now, and it will always be my favorite because of how meaningful it became in the end.
Smoke Story
One of my first times ever smoking Cannabis, I had the opportunity to smoke some White Widow flower. This was days after it had first been released to the world at the Cannabis Cup in Amsterdam. The flower we held that day, as young teenagers, was unlike anything we had seen before. It was beautiful and literally mesmerizing to all of us. We just stared at it for nearly 20 minutes when we first pulled it out of the bag. There was an instant feeling of honor and privilege that came over me. I knew this flower I was holding in my hands had been painstakingly created over years, and then eventually grown to perfection after trial and error, only to go from a farm near Amsterdam to an event in the city there, until it was flown on a plane back to California where I lived and shortly afterwards was in the pocket of my best friend as we skateboarded back to my house with more enthusiasm than I had ever felt before that day. When we finally sat back and enjoyed the smoke, it hit me like an epiphany.. I had found my thing. This was it. Hours later, and after hallucinating a television that was not there even though I could change the channel and everything, I came back to reality. All I could think about was how remarkable this plant was. How special it made me feel.. and here I am over 30 years later still enamored by this gift from God.
Recommendations
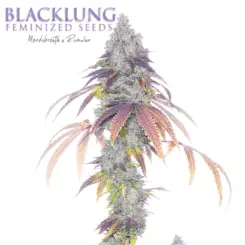
Outdoor Dark Passenger, Romulan (IX2), Gingers, Blacklung, Pure Krush
Beginner Friendly Rocksalts, Gingers, Dark Passenger
Short Flowering Time (under 8 weeks) Salty Pickle, Garlic Fever, Rocksalts, Irie Maiden
Resistance to Disease Most of my creations are very resistant to pressures like disease, mold, and fungus
High Yield Blacklung, Gingers, Romdog
High Test (THC) Romscotti, Pure Krush, Gingers, Romdog
Terpene Heavy Irie Maiden, Garlic Fever, Romscotti, Stinky Pink
Feed the soil. By using natural compost and encouraging beneficial microbes, the soil ecosystem does all the heavy lifting for you—breaking down nutrients and feeding the plant exactly what it needs naturally.
Keep it simple and sustainable. You can reduce, reuse, and recycle so many everyday things for your garden, like making your own compost, collecting rainwater, and growing companion plants. Relying on beneficial bugs (and their nutrient-rich poo!) or brewing DIY organic boosters like sprout tea is way more cost-effective, eco-friendly, and keeps your grow 100% natural.
Enjoy the process and learn from your plant. The most common beginner mistake is stressing out and trying to micromanage everything. Take your time checking in on your garden every day—observe how it changes, and don't be afraid to just slow down. Growing for the first time should be an enjoyable, relaxing experience and a fun learning process.
Favorite Breeding Project
Our favorite breeding projects are probably the ones where we get to work together across Supernatural Seeds and Tastebudz Genetics. Because we’re married, it makes the whole process feel a bit more personal. We both bring different ideas to the table. A good example is two new strains we're excited to release: Tropical UFOG and Purple Mooncake.
Smoke Story
The name Supernatural Seeds actually came about during an evening in our campervan on a road trip around Wales. We wanted our brand to remind people that cannabis is pure nature. Just like the beneficial mushrooms and ancient plant medicines humans have used for thousands of years, it shouldn't be restricted or controlled—it should be recognized for the super natural being it is (like all of us) — so the name Supernatural just clicked. We also love the fun paranormal double meaning, which connects to all our late-night chats about UFOs, space, and the unknown... where we concoct our artwork and strain names.
Strain Recommendations & Genetic Highlights
For outdoor, I would recommend: Galactic Grape Auto, because autos are a practical choice for shorter or unpredictable seasons, finishing quicker while still bringing that sweet, fruity profile.
For beginners, we’d recommend: Sour Orange. It’s a great introduction to feminized strains, with bold citrus, clementine, sherbet, and tangie genetics.
For flowering time under 8 weeks, we’d recommend: Champagne Octane photoperiod, which powers through a fast 7 to 8 week bloom cycle.
Glookie Monster was selected for its naturally resilient genetic profile. From the O.G. Kush side, it carries a rich terpene background of caryophyllene and limonene, both associated with strong aromatic expression and natural plant defence traits. The Gorilla Glue influence adds further resilience through thick branching, strong hybrid vigour, heavy resin potential, and a favourable calyx-to-leaf ratio.
Apple Tart was selected for high yield thanks to its sativa-leaning structure, which supports a rapid growth spurt during early flower and helps maximise canopy coverage. This vigorous stretch allows the plant to develop strong branching and heavy, stacked colas, making it a standout choice for collectors looking for high-yielding genetics.
Best high-THC choice would be: Black Cherry Crush for its potent genetic profile and rich, resin-heavy expression, driven by a powerful indica-dominant lineage and a bold cherry terpene profile.
Permanent Funk is our top terpene-heavy choice for its loud, complex flavour profile—blending caryophyllene from the sweet sherb gas of Permanent Marker with myrcene from the creamy blue cheese funk of Blue Fondue.
For extraction, we’d recommend: Blue Fondue, because its Blue Cheese × Gorilla Glue genetics are known for heavy resin production, delivering a strong terpene profile of cheese, berry, and earthy gas.
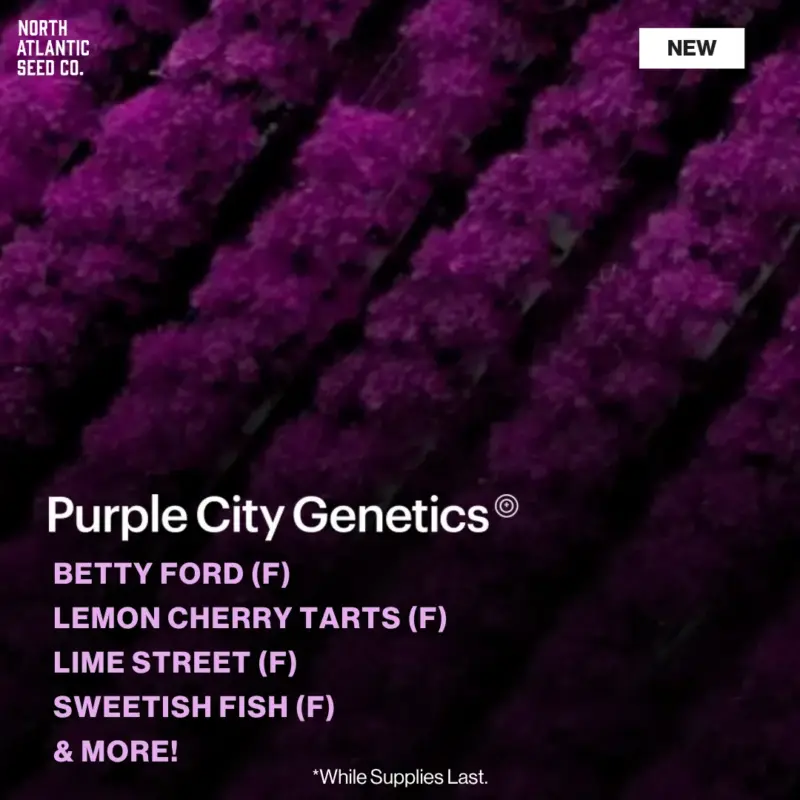
Purple City Genetics is one of the original cannabis nurseries in California—and the last one standing. We're the largest feminized seed producer in the state. We’ve also been on the ground in Barcelona since 2018.
We will always be guided by a few core beliefs: • We exist to match cultivators' dreams and ambitions. • The progression of cannabis requires audacious imagination. • One innovation can ultimately benefit the entire industry.
When it comes to serving cultivators, there's no problem too large or too small. We’re focused on amplifying farmers’ abilities, advancing the cannabis plant’s potential, and inviting everyone to experience growing cannabis for themselves.
Breeding at Purple City Genetics is both evolutionary and revolutionary. We are dedicated to continually improving demonstrated approaches as well as manifesting completely original ideas that force a reappraisal of what's possible. Every exploration serves the unrelenting pursuit of better cannabis. To that end, we are grateful to have been recognized with multiple collaborative State Fair and Emerald Cup wins. Our work is never over.
The NASC Cast Crew had the pleasure of sitting down with Auryn of Purple City Genetics. Listen to what he has to say below, and follow us on Vimeo for even more content!
Buried in the FY2026 Agriculture Appropriations Act, signed into law November 12, 2025 and coming into effect on November 12, 2026, is a provision that quietly redefines how cannabis seed is regulated under federal law. Section 781(1)(C)(i) would, in an unprecedented manner, disrupt the U.S. hemp seed supply chain by classifying seeds as a federally controlled substance based on the THC content of the parent plant, regardless of the chemistry of the seed itself. The provision is unnecessary to accomplish the stated purpose of Section 781, which separately restricts intoxicating cannabinoid products through targeted product-level limits. The seed provision would unnecessarily hamstring American farmers, researchers, breeders, small businesses, and medical patients by criminalizing seeds, ceding the global hemp cannabis genetics market to international competitors.
The provision regulates seed by lineage and traceback, not chemistry and subjects seeds to DEA jurisdiction.
Section 781(1)(C)(i) excludes from the federal hemp definition “any viable seeds from a Cannabis sativa L. plant that exceeds a total tetrahydrocannabinols concentration (including tetrahydrocannabinolic acid) of 0.3 percent in the plant on a dry weight basis,” with the result that seeds would be controlled substances (mandating seed destruction and DEA penalties). For the first time in U.S. hemp law, a material’s legal status is determined not by what it is, but by where it came from. Cannabis seeds do not produce THC — cannabinoid biosynthesis is localized exclusively to glandular trichomes, tissues that seeds do not contain. Yet under Section 781(1)(C)(i), even though a seed tests below the 0.3% total THC threshold, it can be criminalized and classified as a DEA Schedule I controlled substance because of the parent plant’s chemistry. No other agricultural commodity in active U.S. commerce is regulated this way. No federal regulation evaluates wheat seed by the alcohol content of the beer it could be brewed into; no federal regulation evaluates corn seed by the aflatoxin level of its parent field. Section 781(1)(C)(i) breaks from this established principle without precedent.
The compliance standard cannot be met.
The statute is too vague for USDA’s successful implementation. The statute requires traceback from the seed to the parent plant, and the parent plant must in turn be tested and shown to be below 0.3% THC by dry weight (as a living plant, testing is dependent on field location, temperature, days to harvest, etc., and is virtually impossible to enforce as part of a traceback system). A full traceback system would require, at a minimum, significant new regulations and appropriations for USDA. In addition, jurisdiction would be shared with DEA, which would have a role enforcing penalties and managing destruction of criminalized seeds, requiring new funding for DEA.
Implementation of the statute would result in the loss of U.S. seed banks and genetic material passed down for centuries. For germplasm already in lawful possession on the effective date, parental THC history cannot be reconstructed at any cost — the parent plant no longer exists to be tested. No regulation USDA could issue can supply a compliance pathway for material already in lawful commerce. Without congressional action, a seed bank or research institution that lawfully holds tens of thousands of seeds on November 12, 2026 becomes subject to the Schedule I framework.
The provision harms patients, veterans, and Americans.
Implementation of the provision would restrict access by patients, veterans, and Americans to the genetics needed for home and state-licensed cultivation. As of 2024, 47 states, the District of Columbia, and three territories allow medical cannabis use. Approximately 25 jurisdictions authorize home cultivation, where registered patients reproduce specific cultivars from seed to maintain consistency of cannabinoid and terpene profile — including CBD:THC ratios used in seizure management and low-THC, high-CBG cultivars used in inflammatory and neuropathic pain management. Section 781(1)(C)(i) withdraws the federally compliant pathway by which seed for those cultivars moves interstate, at the same moment that federal rescheduling under AG Order No. 6754-2026 expands medical recognition. Veterans accessing alternative therapies, patients treating seizure conditions, and Americans using cannabis for chronic pain and sleep lose access to the specific genetics on which their stabilized care depends. Implementation of the provision would interfere with state laws, federal laws, and the direction of policy to provide access for patients to needed inputs for home cultivation.
The provision cedes the global cannabis genetics market to foreign competitors and ends U.S. interstate commerce.
No global trade competitor’s jurisdiction regulates and criminalizes cannabis seed by parental plant THC traceability. At a time when other countries are opening up their seed markets and deregulating to obtain competitive advantage, the U.S. would impose a compliance burden no major trading partner imposes, hobbling our U.S. dominance. At the same time, the provision would balkanize our own U.S. market among 50 states, ending interstate commerce when a domestic market is needed. Federal law governs interstate commerce, and Section 781 will make seeds federally illegal scheduled products — based on a vague, unenforceable standard — thus chilling interstate commerce in seeds. Without a national market, investment in seed innovation and commercialization will be severely set back.
The economic stakes are real and growing.
Hemp grown specifically for seed production was valued at $41.5 million in 2021 (USDA NASS, 2022), contracted sharply in 2023 to $2.9M, and has since rebounded — reaching $16.9 million in 2024 and $49.7 million in 2025, surpassing the 2021 peak (USDA NASS National Hemp Report, April 2026). Total U.S. industrial hemp production value reached $739 million in 2025. Classification of seed as a controlled substance has deep-reaching negative impacts for small rural businesses, investments, financial institutions, credit card processing, and banking services. American breeders are well-positioned to lead the global cannabis genetics market. Section 781(1)(C)(i) hands that opportunity to international competitors at precisely the moment when U.S. operators are scaling to compete. The overarching result would be unnecessary job loss through misguided and excessive regulation.
Congress should act before the November 12, 2026 deadline. ASIGA’s proffered remedy is to strike Section 781(1)(C)(i) in its entirety. Seeds are already covered by the base hemp definition under the 2018 Farm Bill — if a seed tests at or below 0.3% THC, it is hemp under federal law. Section 781(1)(C)(i) is not needed to accomplish Section 781’s stated purpose; Sections 781(1)(C)(ii) through (iv) already restrict intoxicating products directly by regulating the final consumer product. Congress must take urgent action to protect America’s seed future for growth and innovation.
Offensive Selections shares 3 tips for new growers, and more! Don't miss out on all the great deals from Offensive Selections for Breeder of the Week!
3 Tips for New Growers
Genetics are king and always have been It's critical that we're cultivating genetics (whether from clone or starting from seed), that are sourced from breeders/brokers that have a historical record working with authentic varieties. Achieving this is harder than it should be and genuine authenticity is less common in 2026 than you'd expect. Beware of who you let in to your garden, even indoors, our cycles/year and cycles/lifetime are precious.
If your ability to invest in infrastructure is limited, do not short yourself on your grow light(s) or your cooling ability If you have elite genetics with a great light (think of brands with historical success in this space like Gavita, Fluence, Phantom, etc) you are off to a better start than 60-70% of your peers.
Choose carefully who you tell about your exciting new journey Although laws against cultivation have softened around the world, the envy/jealousy type have not. I have always advised that jealous peers are more likely to result in the loss of your crop than the police.
Favorite Breeding Project Our current project with Currency (Blue Power x Runtz) x our flagship cultivar: Sourdough #1. This is a genuine improvement on Sourdough #1 in every category criticized and our prized champion: (Blue Power x Runtz). We have reversed Currency on to the industries most elite (Toad Venom, Red Hotz, VerZace/Black Magic), to name a few) and are slotted for a Summer 2026 drop.
Destigmatizing + Understanding White Label Seeds By Beth Mathieu
What is BWL Bulk/White Label?
BWL is an abbreviation that we use at North Atlantic Seed for Bulk/White Label, and it is how we source our own “house” seed menus: NASC BWL, Private Label, and Commercial Cultivars. White Label is a term that is commonly used among wholesalers, distributors and seedbanks within the cannabis seed industry and beyond, and all it really means is that the seeds were purchased from farmers under the pretense that we could sell them using our own brand and our own name: North Atlantic Seed Co.
Unfortunately, BWL has gotten quite the bad rep in forums and threads online, and that’s why we have always chosen to highlight “BWL” as transparently as we have: 1. We want growers to understand that we did not breed these seeds ourselves. Hopefully, this helps them make an educated decision about who they source their genetics from. 2. We want to destigmatize White Label seeds. Below, I am going to discuss why I think this topic is so important for every grower to understand.
Are BWL Seeds Bad?
Our perspective–as people who understand this industry quite well–is that BWL seeds can be just as great and just as terrible as any other seed. Shocking, right?
What matters is the intent and the breeding practices of the farmer who made the seeds. Like any industry, there are seed mills out there churning out millions of seeds a month purely for the profit; these businesses probably don’t have the grower’s best interests at heart. Conversely, there are craft operators that put a great deal of heart, care, time, and expertise into their breeds. Both types of farmer can supply BWL seeds, so sourcing is really what becomes important, and that is guided by our values as a business, and your values as a grower.
Agriculture and farming is an industry where it’s hard to make a good living nowadays. As farmers and breeders ourselves, we have lived this struggle, and we have no shame in supporting breeders who are creating and refining high-demand genetics for others to brand and sell.
There are many breeders in our community who are incredibly passionate and knowledgeable about genetics, but they have no interest in all of the other things that come along with running a front-facing business: They don’t want to sit behind a computer all day, or work on marketing campaigns, or become beholdent to social media. They want to be in their gardens. And yet that is the business of seeds; more and more, that is what it takes. For these types of breeders and farmers, White Labeling seeds gives them an opportunity to make a living doing what they love without having to be a great business-person at the same time. For this reason, we are not ashamed at all to source White Label genetics for our house brand, but in large part, that’s because we do our due diligence. We are intentional about the breeders we support and rely on in this way because we care about your experience as growers.
Where Does NASC Source BWL Seeds From?
At North Atlantic Seed, we are always trying to improve and refine the seed menus we are offering to our growers. And I’m not just saying that. We care so much about getting this right, and we recognize that this is what builds trust and integrity.
If you’ve been watching closely over the years, you might have noticed that the North Atlantic Seed BWL menu has undergone frequent changes. While we don’t have the ability to grow out every single strain ourselves, we try to grow out as many as we can, and we listen closely to what our customers are telling us about their experience with these seeds. We have turned our menus over many times, and we have tried the same strains from many different breeders. We are always whittling away, trying to make our BWL menu better. This is a process that will never stop because genetics will never stop evolving and getting better.
What we want you to know and hear is that NASC sources genetics from the breeders you already know and trust, as well as from other farmers who you might never know, but who deserve to have their genetics grown just as much as the next person. These are people who are doing good work and they are good people.
Ultimately, we understand that people are going to have opinions about breeders, genetics, White Label seeds, and virtually everything else. Have it. But we want to set the record straight as far as NASC’s relationship with White Label goes: A lot of the derogatory commentary we see tossed around online is so off the mark from the reality of the industry, and it gives people a bad taste about something that is very misunderstood. Yes, there are bad actors out there, but my hope is that our growing community is aware that there are a lot of good actors too, so let’s not stigmatize this category of seeds as a whole. That only serves to hurt the breeders and farmers who are doing hard work and trying to make an honest living just like you and I.
Thank you to everyone that donated to this important cause! Together we have raised over $20,000! Let's continue to fight and protect home growing for years to come. Read more for the latest updates on Keep Seeds Legal!
Happy Spring, Everyone!
I sincerely hope that you have all been keeping your chins up amidst the uncertainty that surrounds us right now, enjoying a beautiful spring (damn if that sun doesn’t feel so good), and gearing up for another growing season ahead.
For the last several months, we've been quieter with you than usual, and we feel that it’s due time for an explanation.
Behind the scenes, we've been working on something we believe will shape the future of the American seed industry: the launch of the American Seed Innovation & Growth Alliance (ASIGA) – www.asiga.org.
ASIGA is a coalition we’ve built to challenge the legislative changes scheduled to take effect in November 2026. We deliberately chose not to ring alarm bells in your inbox until we had something real to show you. Now we do.
What this fight is — and what it isn't:
We want to be clear up front about how ASIGA is positioned, because framing matters so much in Washington.
ASIGA's political case rests on three pillars: Innovation, genetic diversity, and American leadership in plant science and breeding. The legislation moving toward November 2026 threatens all three. It risks narrowing the genetic pool that U.S. breeders can legally work with, slowing the pace of innovation that has put American breeders and banks at the front of a global industry, and ceding ground to overseas competitors who will happily fill the gap.
This coalition is a big tent, fighting for an agenda that affects every arm of the US hemp industry: Industrial hemp, seed banks, plant scientists, breeders, and home-growers alike. The case we are making on the Hill is about protecting an American industry, American jobs, and American scientific leadership. That's the case that wins votes, and that's the case ASIGA is built around. We feel optimistic that we have a winning and compelling position if we maintain a narrow focus: Preserving access to seeds, a non-intoxicating agricultural input that is at the heart of a multibillion dollar industry.
What we've been doing:
For months, we've been meeting at the highest levels in Washington — quietly, persistently, and with a team built specifically for this fight. ASIGA's lobbying and communications group brings together experienced hemp policy advocates, former USDA officials, and seasoned operators who know how the Hill actually works. Alongside a number of other independent businesses, and industry organizations, we're funding this effort monthly — structured for the long haul, not a one-off campaign. We need a voice in DC representing seeds, an often-overlooked, but foundational part of the industry.
The work is unglamorous: briefings, redrafts, relationship-building, education, and the slow grind of getting the right facts in front of the right people. It's also the only thing that moves the needle on legislation of this scale.
What's at Stake:
If the November 12 law takes effect this fall, it will restrict access to essential genetic material, undermine breeding innovation and new cultivar development, damage legitimate operators, and push activity underground to the black market.
Criminalizing hemp seeds will reduce consumer and patient safety, destroy small businesses and jobs across the supply chain, inhibit access to the medicine that works for you, stifle critical research and development, and hand global leadership in hemp and cannabis genetics to Europe, Latin America, and emerging Asian markets.
The United States has the science, the agricultural infrastructure, and the entrepreneurial base to lead this industry for the next decade if our leaders cultivate a safe environment to do so. This law would foreclose that future before it begins.
Where you come in:
We held back from asking until we had earned it. We now have an active coalition, a strong team, and meetings happening that simply wouldn't have happened six months ago. To carry this through to November 2026, we need our customer base with us.
This community has shown incredible generosity already in donating to the Keep Seeds Legal campaign that we’ve run on the NASC website over the past two months. We’ve raised over $14,000 dollars for this cause already thanks to each and every one of you who donated. We plan to continue this campaign until this fight is resolved.
There are two other things you can do right now:
1. Contribute to the GoFundMe. Every dollar goes directly into ASIGA's lobbying, legal, and communications work. We chose the GoFundMe infrastructure specifically so that donors receive ongoing, transparent updates on where the money is going and what it's accomplishing. In addition, 100% of funds donated at checkout to NASC’s Keep Seeds Legal campaign will go directly to this fight as well.
2. Watch for the white paper. We're finalizing a detailed white paper that lays out the specific legislative threats, the policy alternatives ASIGA is advancing, and what each scenario means for the American seed industry.
One last thing…
We're sorry we haven't brought you in sooner. The honest answer is that we wanted to wait until we had something concrete; something worth standing behind. We do now — and we'd rather have you with us than reading about it after the fact.
Thank you for being part of this community and fighting the good fight alongside us. We know you all care about this issue as much as we do. We'll be in touch again soon, and far more often.
With Gratitude,
Beth + the entire North Atlantic Seed + Dirty Bird Genetics Family
By purchasing one of the following items, you can help fund the legal future of cannabis seeds! Donation options also available at checkout!
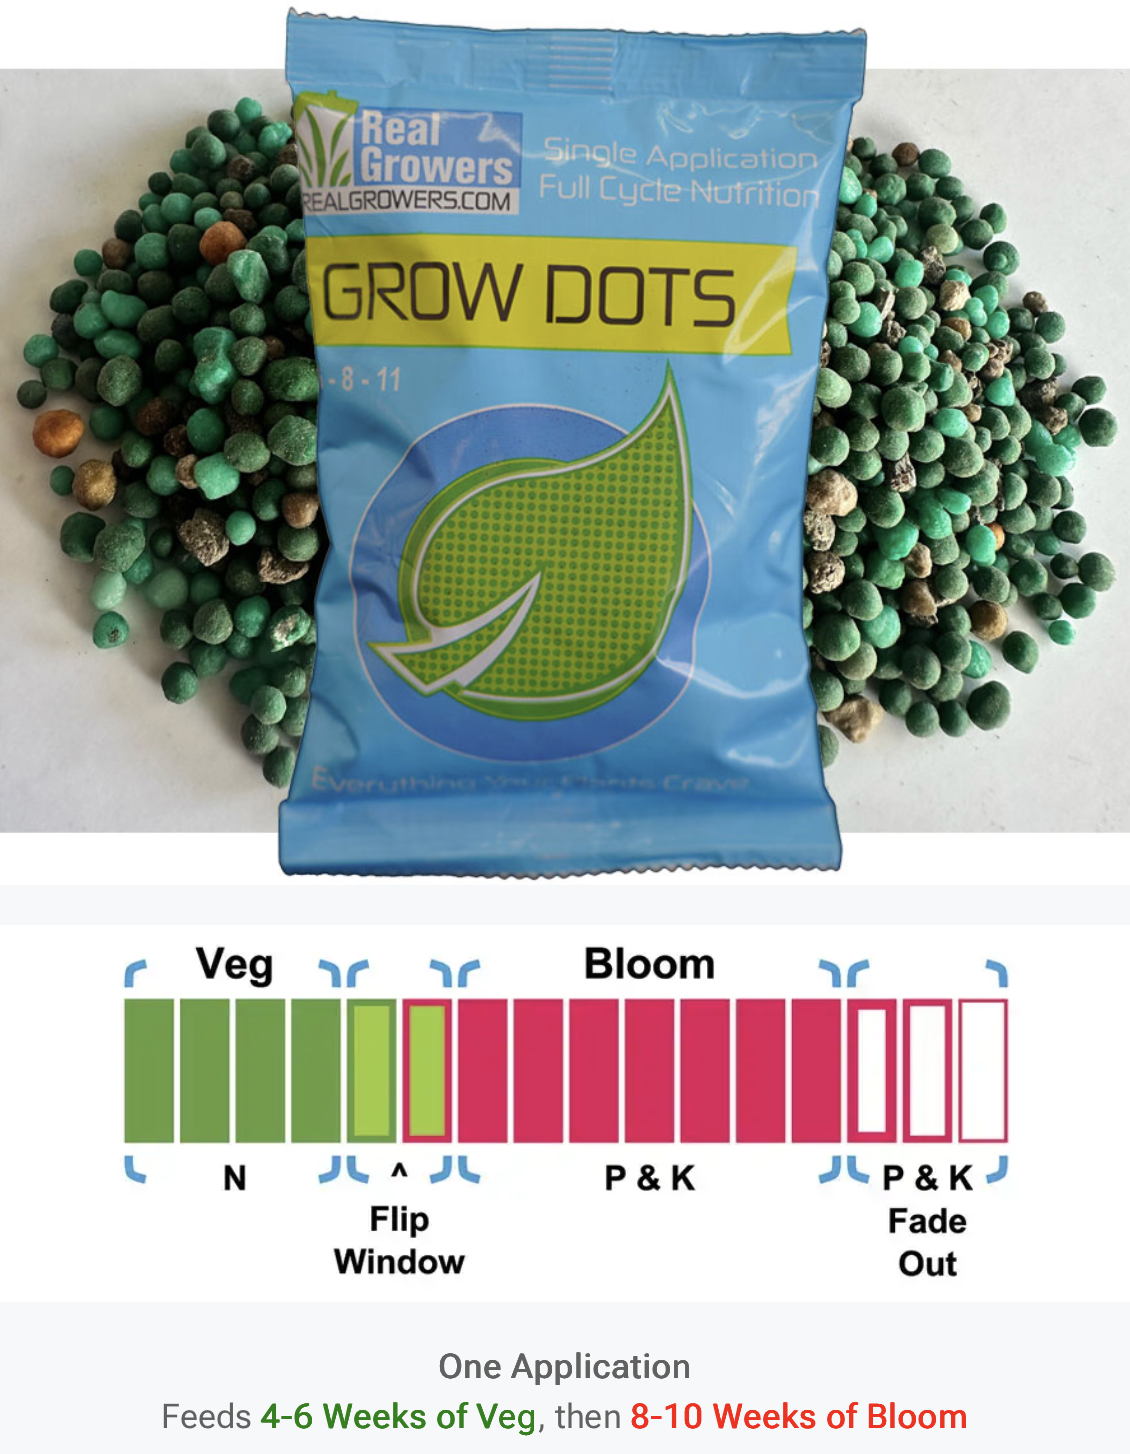
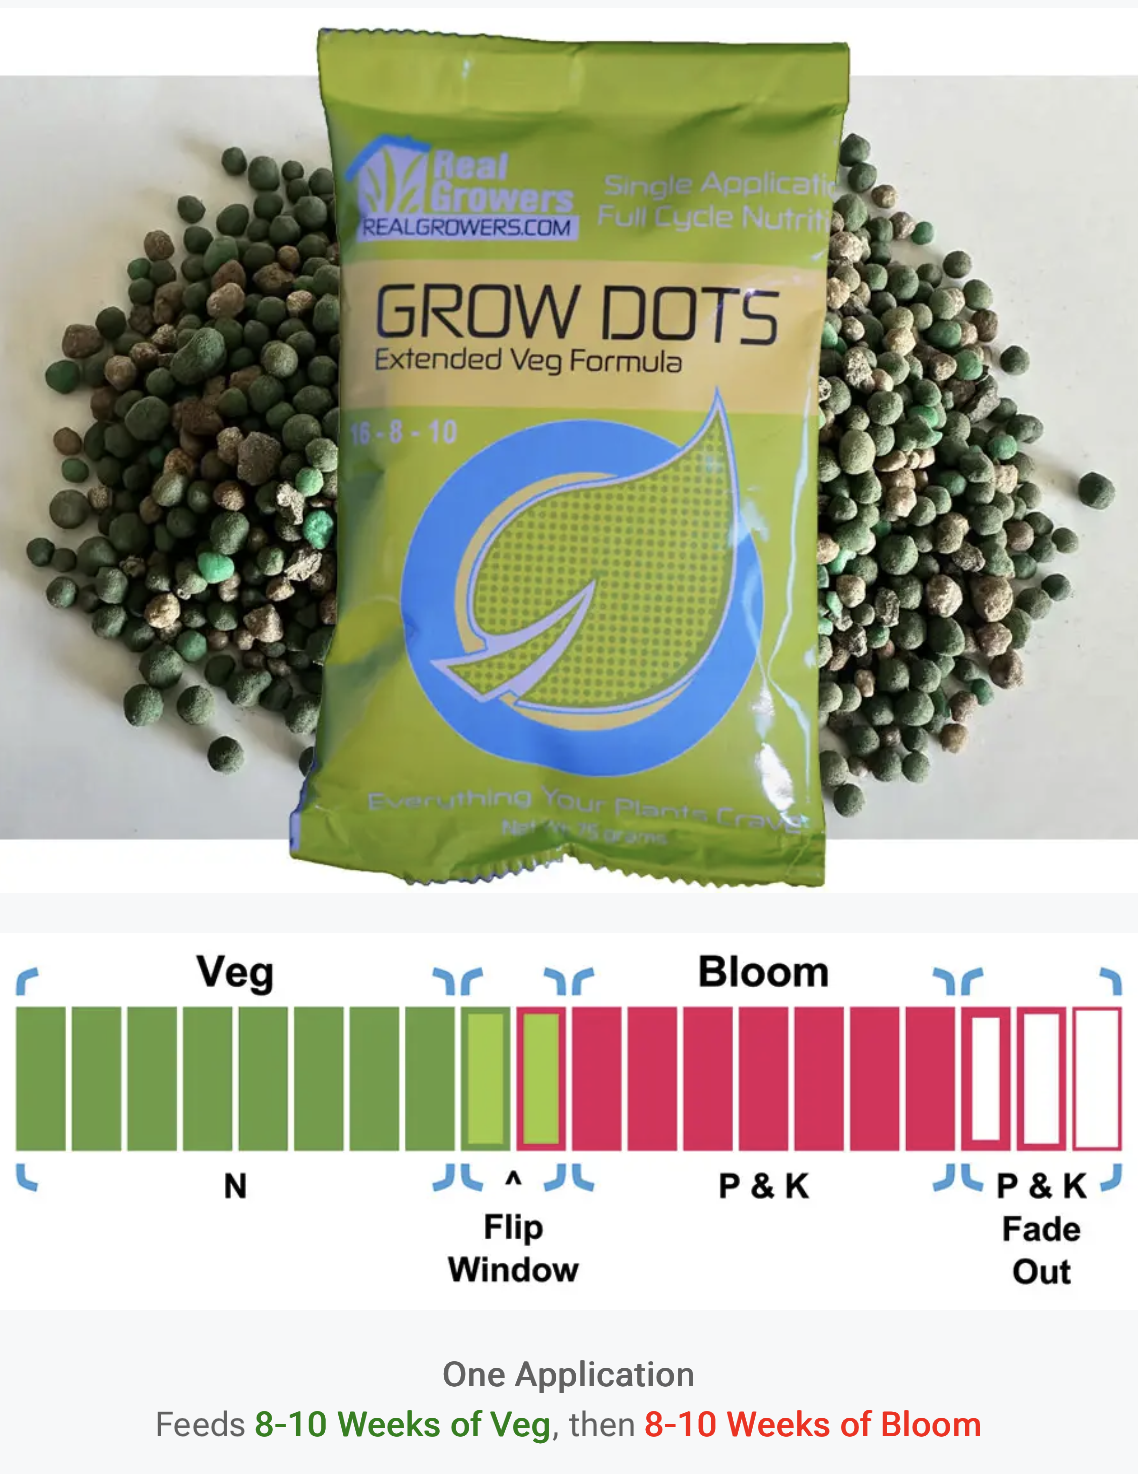
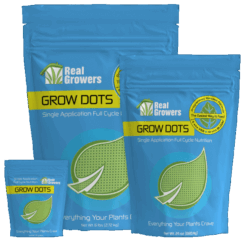
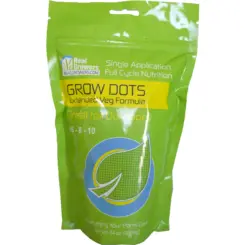
We are extremely excited to now be carrying Grow Dots. You can now leave all of your worries and wonders about nutrients behind with this programmed Released Fertilizer. They make growing easier and achievable for anyone. Continue reading below to learn more about Grow Dots.
Grow Dots Classic Formula Perfect for Indoor and Autoflowers
Grow Dots Extended Veg Great for Indoor and Outdoor Grows
With Grow Dots, you feed once at the beginning — and your plants stay fed all the way to harvest.
Grow Dots are made for growers who run a 4-5 week veg cycle and an 8-week bloom. They’re designed for a quick veg and flip grow style, making nutrient management effortless.
Features & Benefits
Two-Stage Nutrient Release — Automatically transitions from veg to bloom nutrients.
One-Time Application — Mix into soil or coco once, and you’re set.
Slow-Release Micronutrients — Keeps plants healthy for the full grow cycle.
Eliminates Daily Feeding — No need for constant adjustments or mixing.
Reduces Nutrient Runoff — Saves money and protects the environment.
Best Results in Coco — Works in all mediums but performs best in coco coir.
Unexpected Benefits
More Free Time — No daily nutrient mixing means less stress for you.
Great for Beginners — No complicated feeding schedules to figure out.
Travel-Friendly — Grow Dots keep feeding your plants even if you’re away.
More Cost-Effective — Costs less per plant than traditional liquid nutrients.
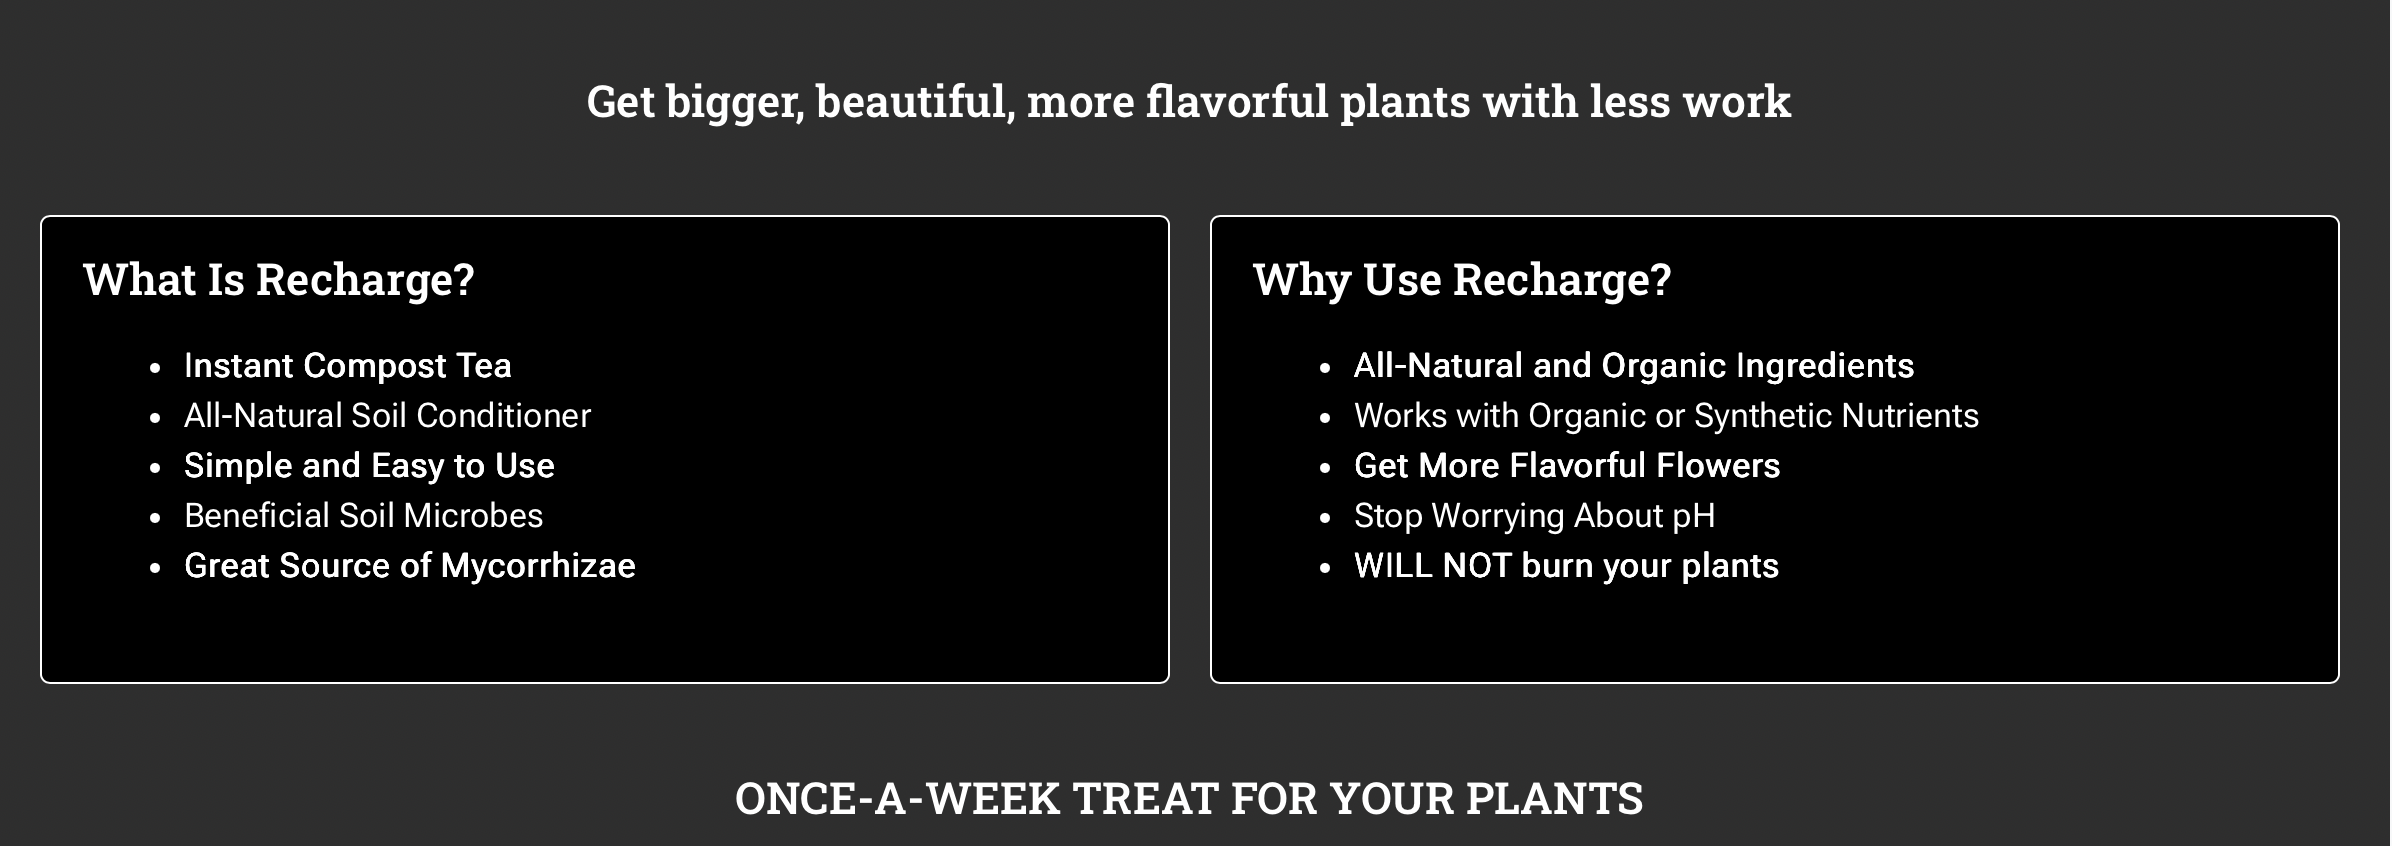
Why Growers Swear by Recharge
Grow bigger roots. Grow better plants. Grow with less stress.
Recharge is an instant compost tea in a pouch. Just mix with water, pour on your plants, and let billions of beneficial microbes go to work.
These living microbes grab nutrients in your soil, break them down, and deliver them straight to your plant’s roots… so nothing goes to waste.
What that means for you:
Faster-growing, more resilient plants
Bigger roots = bigger yields
Reduces pH headaches and nutrient lockout
Lower risk of nutrient burn and root rot
Stronger plants that resist pests and stress
And it all happens in days, not weeks.
Buy or browse Grow Dots and other grow supplies here!
Moroccan Peaches and the Rise of the Sativa Hash Plant, story provided by Purple City Genetics
Hash has lived in a narrow lane for a long time. Heavy. Sedative. Indica-dominant. The plants that wash well are almost always the ones that put you down. Dense resin, strong returns, predictable results. And for years, that tradeoff was accepted. If you wanted yield, you gave up energy. If you wanted lift, you gave up washability. Two different worlds.
The Constraint
Sativa plants have always carried some of the most compelling terpene profiles in cannabis. Citrus, tropical fruit, bright, volatile expressions that jump out of the jar. They also tend to fail where hash begins. Loose trichome structure. Lower return. Poor mechanical separation. So they get pushed out of the category. Distillate inputs. Flavor contributors. Not centerpiece hash. Meanwhile, the hash world optimized around what worked. The result: technically strong, but creatively limited.
El Krem: A Different Objective
El Krem was built to break that constraint. Not by chasing THC. Not by chasing yield alone. By selecting for expression first. The goal was to create plants that could sit on a table with dozens of jars and still stand out. Lime, orange, peach. Layered terpene profiles that don’t flatten out after extraction. At the same time, every cultivar had to function in the real world. Flower or hash. Jar or wash. Because growers don’t get to specialize anymore. They need optionality. This is what defines the El Krem line: dual-use genetics built for both flavor and function
Moroccan Peaches
Moroccan Peaches didn’t arrive quietly. From the start, it stood out for combining two traits that rarely coexist: Effect and washability. A sativa-leaning hybrid with loud lemon, orange, and peach terpenes. Bright, expressive, immediately recognizable. But what made it different wasn’t just the flavor. It was how that flavor behaved. Across crosses, peach showed up consistently. It held its signal. It carried through different pairings without collapsing into sameness. More importantly, it didn’t flatten everything around it. It organized it. Part of what makes that possible is structural. The peach-leaning expressions we’ve selected tend to carry dense, uniform resin heads and a terpene profile that reads clearly even after processing. That combination matters. It means the signal doesn’t just. of stability is present, it stops behaving like a note and starts behaving like a framework. That’s when you can actually build around it. Peach became a baseline strong enough to pressure-test everything it touched. Traits paired with it had to hold their ground. The ones that did started to define the edges of the expression: citrus on one side, gas on another, candy and sour filling in between. The ones that didn’t got absorbed. That’s how the range sharpens instead of getting muddy. Underneath that, structure. Resin that actually separates. Trichomes that hold. A plant that returns when you wash it. That alone would have made it notable. The effect made it different. Upward. Energetic. Engaging. Not the slow descent most hash delivers. That combination changed how people thought about what hash could be.
Why It Stuck
Most hype strains fade. Moroccan Peaches didn’t. Because it solved a real problem. It gave extractors something new to work with. It gave smokers a different kind of experience. It gave growers a plant that could perform in both lanes. That’s rare. And when it shows up, you build around it.
The 2026 El Krem Peaches Collection
For 2026, Moroccan Peaches became a foundation. Not a single release. A breeding block. The goal was to expand its core traits across a wider spectrum without losing what made it work. Each cross explores a different edge of the same structure: ● Fez: peach nectarine layered with incense and citrus depth ● Habibi: peach and Z-driven structure with strong bag appeal ● Moroccan Zowah: extraction-forward with candy and sour gas undertones ● Saffron: shorter cycle while holding the peach-forward identity ● Cheri Granada: full-spectrum fruit expression with floral and wood notes Different directions. Same backbone.
Beyond the Pack
Seedlings and clone releases pushed the work further. Different pairings. Different environments. Different outcomes. Some leaned tropical. Some leaned gas. Some sharpened citrus. Others pulled deeper into kush structure. Not every expression needs to last. But every expression adds resolution. This is the same philosophy behind the seedling program: early looks into where the line is going, not just finished products
The Shift
El Krem represents a change in how hash is evaluated. From yield to experience. From output to expression. Moroccan Peaches sits at the center of that shift. Not because it’s louder. Because it expands the range without losing structure.
The Point
Cannabis isn’t supposed to exist in one lane. Not in flower. Not in hash. Not in experience. El Krem is built to preserve that range on the extraction side of the plant. Because once you start narrowing what works, you don’t just lose options. You lose entire categories of experience. Written by Eric Rosen, Purple City Genetics
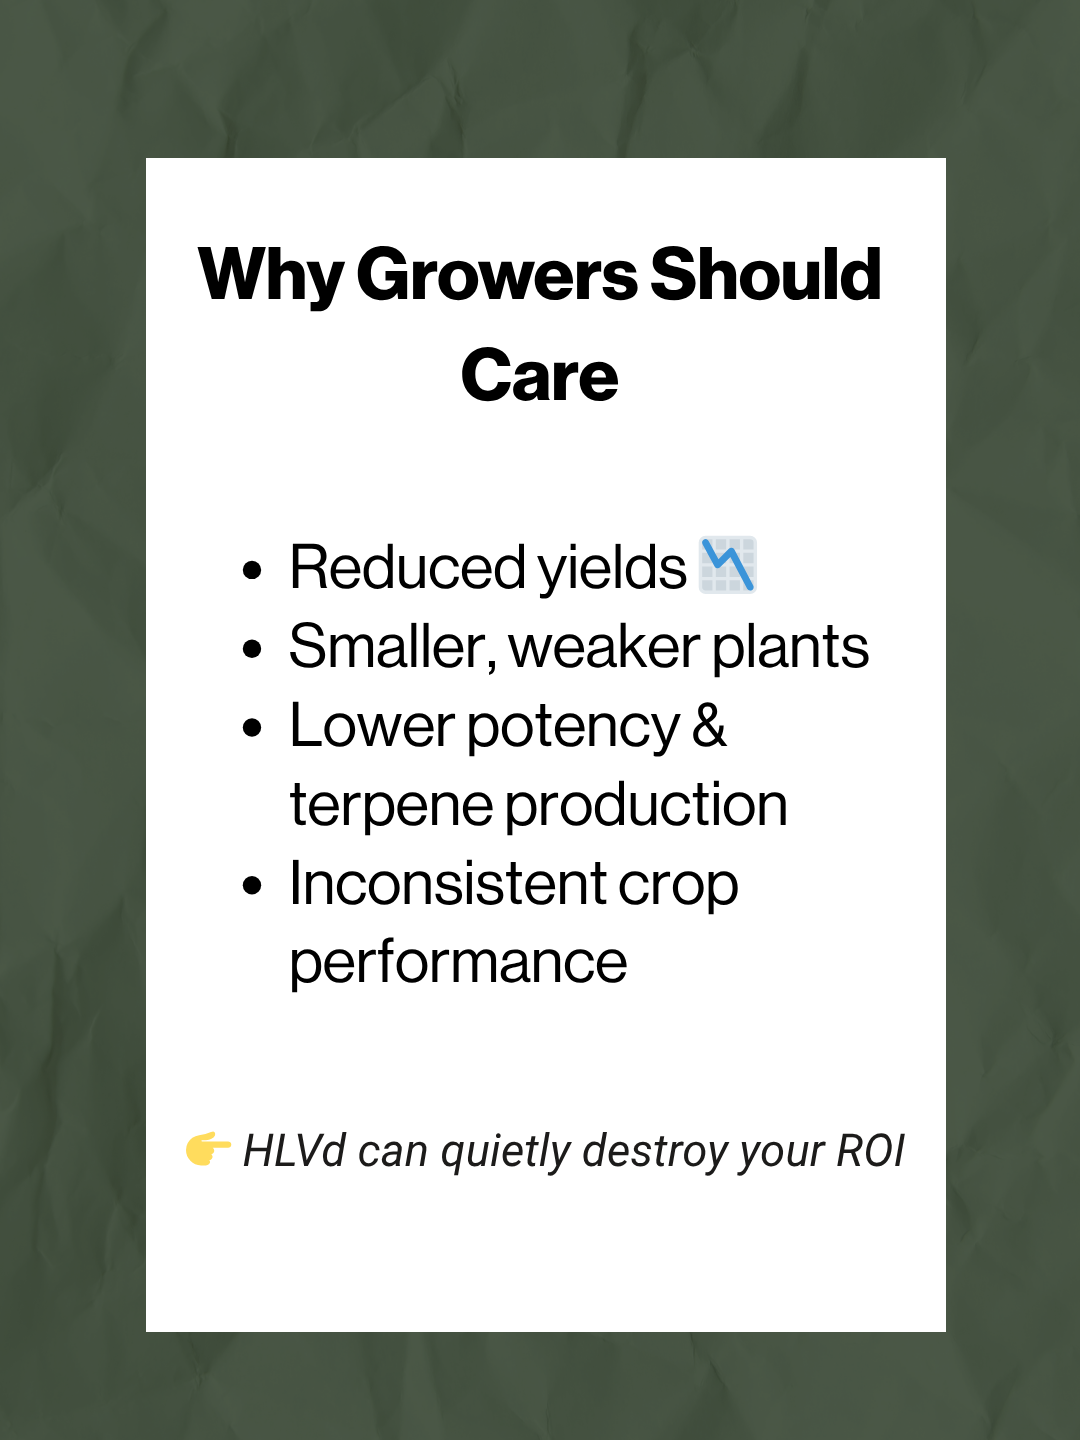
Temperature, relative humidity (RH), and vapor pressure deficit (VPD) are three major variables that growers must monitor and control, if possible, to maximize their cannabis yields and keep their grows clean from mold. In this article we will discuss all three variables and how they relate to one another in the context of growing cannabis.
Temperature: This is a variable everyone is very familiar with. It is the measure of ‘hotness’ or ‘coldness’ (i.e. the average kinetic energy of particles in a substance) expressed in terms of one of many scales (e.g. Fahrenheit, Celsius, Kelvin, etc.). The scale most people in the U.S. are familiar with is the Fahrenheit scale. Outside of the U.S. the Celsius scale, based on the freezing and boiling points of water, is more commonly employed. Regardless of the scale you use, it is important to know that cannabis prefers certain temperature ranges to maximize growth and plant health.
Vegetative Stage: Cannabis, like many plants, enjoys moderately warm temperatures usually in the range of 70-850F (~21-300C). During the vegetative stage of cannabis’ life, it prefers the previously mentioned temperature range during the day (lights on) and 65-750F (~18-240C) during the night (lights off). This temperature range will promote fast and lush growth as well as efficient nutrient uptake. Temperatures above 850F can cause heat stress and may lead to leaf tips burning. Higher temps can also invite pests such as spider mites who reproduce faster in higher temperature ranges. Temperatures below 650F during the day, or during the period when grow lights are on, can limit cannabis growth and can reduce nutrient absorption.
Flowering Stage: During the flowering stage a slightly lower daytime (lights on) temperature range of 70-800F (~21-270C) is recommended, with 75-770F (~23.8-250C) being the optimal day time temperature range. The optimal nighttime temperature range for the flowering stage is 60-700F (~15.5-210C). A 10-150F drop in temperature at night (lights off) can stimulate resin production and can even bring out purple/pink hues in certain strains. The 70-800F temperature range during the day helps to promote vigorous growth without the risk of degrading and evaporating off a large percentage of the terpenes that makes your plant(s) so special. This temperature range also encourages dense flowers as high temps during flower can lead to airy, fluffy buds.
If using CO2 to enrich the grow area, it is possible to raise the daytime temperature range to 80-900F (27-320C), although we still recommend not exceeding ~820F to avoid any chance of buds becoming too airy or “fluffy.” The reason for the ability to raise the temperature when supplementing CO2 is due to the higher rate of plant metabolism caused by higher temps. This allows the plant to consume more light and nutrients as well as create sugars at a faster rate of photosynthesis due to excess carbon availability. If you are not treating your grow space with CO2 it is highly recommended to keep daytime temps as close to 75-770F as possible.
Temperatures under 550F (~130C) can stall growth and induce shock in your cannabis plants so avoid letting your grow get under this temperature.
In the last 2 weeks of flower, many growers have reported increased terpene retention, as well as increased resin production, when lowering the daytime grow room temps to a range of 65-700F (18-240C).
Relative Humidity: Humidity refers to the water vapor held in the air. Absolute Humidity is the total amount of water vapor held in the air regardless of the temperature. Relative Humidity (RH) is a measure of how much water vapor is held in the air as a percentage of the maximum amount of water vapor that could be held in the air at a given temperature.
Absolute humidity is not temperature dependent as it is simply a measure of the total amount of water vapor in a mass of air.
Relative humidity is temperature dependent as warmer air can hold more water than colder air can. This means that when the temperature drops at night, the air may feel “stickier” or “denser” despite having the same amount of total moisture as it contained during the day. As the air cools, the molecules that make up the air get closer to one another and this leaves less room for water vapor to be held. This doesn’t raise the absolute humidity but does raise the relative humidity of a mass of air. This is important to remember as it means the RH of your grow space will increase when the lights go off, even if no new moisture is added to the environment. Ensuring proper air flow in your grow space can help prevent micro-climates with excess moisture from building up.
Having the right relative humidity in your grow room is paramount for plant health and for suppressing pest and fungal infections. If RH is too high, it can invite mold that can ruin your crop before or during harvest. If RH is too low, it can create drought stress in the plant and invite pests such as spider mites that thrive in drier conditions.
Optimal RH ranges for cannabis vary depending on what stage of growth the plant is at.
Seedling/New Clone Stage: 60-80% RH to help plants absorb water as they grow their root system.
Vegetative Stage: 50-60% RH is usually a good range for the vegetative stage. Not so high that it invites quick mold infections but also not so low that it risks stressing your plant(s) out.
Some growers use a range of 55-65% RH for early veg and then a range of 45-55% for later veg.
Flowering Stage: 40-50% RH for early flower with a range of 35-40% RH for late flower (last 1-2 weeks before harvest). The plant has well established roots at this stage and doesn’t require as high a relative humidity for water absorption. The lower RH range also helps to prevent bud rot (botrytis) and other fungal infections in the flowers as they finish. Take care to balance low RH with appropriate temps to not evaporate or degrade the terpenes generated by your cannabis.
Vapor Pressure Deficit (VPD): In simple terms, Vapor Pressure Deficit (VPD) is a measure of how much “space” there is for water vapor in the air at a given temperature. This is different from relative humidity as RH is a % whereas VPD is measured with units of pressure, usually kPa or PSI (kilopascal or pounds per square inch). RH measures how much water vapor is in the air compared to the maximum amount of water vapor the air could hold at a given temperature. VPD is the difference between how much water vapor is currently in the air and how much moisture the air could hold at a given temperature, essentially measuring the remaining "space" for water vapor.
Why is this important? It is important to understand VPD as it is a primary driver of transpiration in plants which also means it is a primary driver of nutrient uptake. Plants pull water and minerals through their xylem cells from the roots to the leaves of the plant and the VPD of the surrounding environment drives this “pulling” (like sucking liquid through a straw). Too high a VPD can cause plants to dry out too quickly and can cause their stomata to stay closed, which does not allow for good CO2 intake from the leaf. It can also cause wilting on the leaves as well. Excessively high VPD can also cause potential nutrient burn from nutrients being pulled too quickly in too high a concentration to the leaves. Too low a VPD can decrease nutrient uptake and can lead to mold as there may be too much water vapor in the air. This can stunt a plant’s growth and diminish the final yield if not remedied. Low VPD can also cause calcium deficiencies which can further lead to stunted growth of your cannabis.
VPD is related to temperature and to relative humidity in the following ways:
As temperature increases, the air’s ability to hold water vapor increases exponentially. This means the potential for high VPD increases with heat (assuming RH stays constant).
As relative humidity increases, the air becomes more saturated with water vapor, reducing the deficit, and thus the potential for low VPD increases with increasing humidity (assuming temperature stays constant).
If temp increases and RH stays constant or decreases, VPD increases. (Hot/dry air)
If temp decreases and RH stays constant or increases, VPD decreases. (Cool/wet air)
If temp and RH increase, it can lead to moderate or to high VPD. This is because the air heating up allows more water vapor to be held but increased humidity decreases the space for water to evaporate from plants, thus keeping the VPD moderate to high. The resulting VPD will be most affected by whichever variable is increased to a greater degree. If temperature is raised much more than humidity, then a high VPD will be achieved due to more space in the air for water vapor. If humidity is increased much more than temperature, then a moderate, or even low, VPD can be achieved due to more water vapor being added to the air.
The same is true if temp and RH are both decreased. Depending on which variable is decreased to a greater extent, the VPD will respond accordingly. If temp is lowered much more than RH is lowered, VPD may decrease due to less space in the air for new water vapor to be held. If RH is lowered much more than temperature is, then a higher VPD may still be possible due to the removal of water vapor from the air.
Optimal VPD for cannabis changes as the plant matures. It generally increases from lower levels in the cloning/seedling stage (to inhibit dehydration and wilting) to higher levels in late flower to encourage transpiration and prevent mold. The generally accepted VPD range for the veg stage is 0.8–1.2 kPa. The generally accepted VPD range for the flowering stage is 1.0–1.5 kPa to promote flower health and resin production. These values can be achieved at a few different temperature/relative humidity combinations. That is another reason why VPD is such an important factor in the health of your plants. It is not always about having an exact temperature and/or RH but about having the right balance between the two. As an example, if you are having trouble with humidity throwing off the VPD in your grow space, and if dehumidifiers haven’t been effective in reducing said humidity, then raising the temperature of the space (as long as it isn’t above 82-850F) can still allow you to achieve an optimal VPD for your plants.
Pulse Grow, a company focusing on data-driven monitoring solutions for indoor and greenhouse cultivation, has an amazing reference article if you wish to delve deeper into the concept of VPD which can be found at https://pulsegrow.com/blogs/learn/vpd. On this site, there is a VPD calculator growers can use to determine if the temp and RH of their grow space is creating the optimal VPD for your plants. They also have pre-made charts that make determination of VPD very fast and easy and can be an essential tool in dialing in your grow space.
One last important tip to remember when determining the VPD of your room is to use the leaf surface temperature rather than the room temperature as the surface of your plant’s leaves will be 2-50F cooler than the surrounding environment. Even without a device to measure this quantity, it is easy for one to look at the room temp and simply subtract 2-50F from that value to be used when determining the temperature portion of the VPD equation.
Below is a chart summarizing the optimal temperature, relative humidity, and vapor pressure deficit ranges for cannabis at various stages of growth.
Atlas Seed shares indoor growing tips & strain recommendations! And don't miss out on Atlas Seed Breeder of the Week deals!
Are you interested in cultivating cannabis indoors on a home scale?
Growing cannabis indoors provides an opportunity to have full control over the growing environment and produce high-quality yields year-round.
In this comprehensive indoor cannabis home grow guide, we will walk you through the step-by-step process of setting up your indoor cannabis garden.
From choosing the right equipment and selecting the ideal strains to mastering essential cultivation techniques, we’ll equip you with the knowledge you need to embark on a successful indoor cannabis growing journey.
If you’re looking for a super simple step by step guide, we have prepared a beginners guide to growing cannabis DIY list that you can read in just a few minutes; and for a more in depth exploration, see the table of contents to our expanded guide below:
Easy Home Grower’s Guide for Feminized Autoflowering Cannabis Seeds
Direct sow seeds into the pot at a depth of ¼” that the plant will finish its life cycle in. No need to transplant as shock during this phase can be detrimental to plant growth. Although transplanting can occur with precision .
28-35 days will be Veg and 30-40 days will be Flower. Feed your plants the nutrient mixtures that are appropriate for the stage of growth.
You can pinch/top your plant right before it initiates flowering if you would like a more even canopy and desire multiple kolas at the top of the plant. Only top/pinch 1-2x and DO NOT top/pinch after flowering phase has begun
Use high end light fixtures, either HPS or LED with a PPFD between 650-1000 over the entire canopy for best results.
Trellis your plants with netting or bamboo stakes for best results with even ripening. Remember that plants that are flopped over will not ripen as well as plants standing tall and erect.
Harvest when >50% of trichomes are milky white. Use our flowering times as guides.
Simple Beginners Growers Guide for Feminized Photoperiod Marijuana Seeds
Seeds can be sown directly into pots or placed in a soil plug and transplanted.
Plants can be pheno hunted and cloned when a unique “winner” is found.
Light cycles should be at 18/6 for Veg and 12/12 for Flower
Use high end fixtures, either HPS or LED with a PPFD between 650-1000 over the entire canopy for best results.
Indoor flowering times are between 63-75 days depending on strain
Harvest when >50% of trichomes are milky white.
Table of Contents: Expanded Indoor Growers Guide
1. Planning your Indoor Cannabis Grow: Local Cultivation Laws
A. Know Your Local Laws for Cannabis Growing
2. Choosing the Ideal Cannabis Strain for Beginner Home Growers
3. Cannabis Equipment for Indoor Marijuana Cultivation
A. Lighting for Indoor / DIY Beginners Marijuana Growing
B. Climate Control for Home Grower Cannabis Cultivation
C. Automating Cannabis Home Grows
D. Water Management for Indoor Weed Growing
4. Choosing the Right Growing Medium for DIY Marijuana
5. Nutrients for Indoor Cannabis Cultivation
6. Integrated Pest Management for at Home Cannabis Growing
7. Nursery Management for DIY Indoor Cannabis Growing
Our next toke is Nuclear True Blood by Dirty Bird Genetics. She is a cross of Nuclear Forest x Maui True Blood. Read on to learn about our experiences.
I'm reaching for the Nuclear True Blood when I am ready to unwind for the night. It brings on a very pleasant, mellow relaxation. I was still alert and able to engage, but I definitely didn't want to participate in anything that required hard concentration. It was perfect for a card game with my spouse, followed by an SNL rerun. There were also snacks involved because this one definitely brought on some munchies. Fans of pine and citrus will appreciate Nuclear True Blood's profile.
- Crystal
This strain from Dirty Bird is a fun one! The buds are sugary and dense and have little orange hairs. It has a lovely piney, citrusy aroma and grinds up well. It was fresh and spongy when I got it and burned nice in the bowl. I would consider this a hybrid for sure. It mellows you and calms your mind but doesn’t zap your energy. The effects are relaxing and motivating at the same time. If you smoke it, definitely have some snacks ready!
- Mariah
Read another smoke report featuring Dirty Bird Genetics!
Before their seed bank was created in 2007, RQS had long-time knowledge and passion for cannabis breeding. Following enormous interest in their strains, they opened our first shop in Amsterdam, the Damstraat location, in 2010. In 2011 they launched the Royal Queen Seeds website. In 2016 they welcomed first clients in our shop at Carrer dels Tallers in Barcelona, Spain. In 2022, they opened their newest location in Bangkok, Thailand. In 2023, they started operating in the United States and launched the first true F1 Hybrid Cannabis seeds in the market! Today, RQS operates in the US and in 28 countries in Europe and offers 100+ high-quality strains, growing equipment, growing advice, knowledge, tips and more!
The NASC Cast Crew had the pleasure of sitting down with Max of Royal Queen Seeds. Listen to what he has to say below, and follow us on Vimeo for even more content!
Breeding Cannabis from F1 to IBL with Dirty Bird Genetics
by: Beth Mathieu
First and foremost, I want to send a heartfelt Happy Mother’s Day to all of the mothers here at NASC + Dirty Bird Genetics, to our own mothers, grandmothers, and maternal figures, and to all of the beautiful mothers out there who have been a part of this community with us for the past 10+ years. We see you, we appreciate you, we LOVE you, and we want to acknowledge and celebrate how beautiful the maternal instinct is.
Last year for Mother’s Day, I sat down to write a blog about a plant mother that is near and dear to me personally, and to our NASC/Dirty Bird family: The Brunch. As someone whose career was built upon plant mothers, it seemed fitting on Mother’s Day. The article detailed the filial evolution of this flagship strain that the Dirty Bird Genetics team had created. It was the very first cultivar we bred that really shined, and it really propelled us into this new venture breeding. Looking back now, it’s fascinating to consider how much those first creations (like the Brunch) influenced the genetics to come, much like the generational connections that run through families. The Brunch now sits atop many Dirty Bird Genetics family trees; she’s a mother, a grandmother, and even a great grandmother to many.
This Mother’s Day 2026, I want to pick up where I left off one year ago today, filling in another year of progress as we work our way to the end goal of creating a Brunch IBL (In-Bred Line).
The Brunch F1
The original Brunch F1–a regular, male/female iteration of the F1 strain still found on our menu today–will unfortunately never be recreated because we lost the Peanut Butter Breath mother that was used in the original project back in the early 2020’s. It was a mother I had preserved for almost a decade prior, selected from a revered pack of seeds made by Thug Pug Genetics. These seeds were gold back in the day, and this cut was a favorite of many clone customers I worked with. She created incredibly dense, striking flowers with vibrant greens, dark purples, and bold oranges. Her bud was as top shelf as it comes–easy to manicure, high test, colorful and dense–but her morphology left a few things to be desired. While she wasn’t prohibitively tall, she did have very long internodal spacing, and she was definitely a plant that wanted to grow vertically. Her floral sites were spread out across long stems, meaning she wasn’t the best yielder. Her terpenes were self-referential: Nutty and earthy. We knew there was likely more to draw out here.
The Peanut Butter Breath cut #3 by Thug Pug used to create the Brunch F1
The Mimosa father, selected from a pack of Mimosa by Symbiotic, had beautiful morphology and strong, tangy terps that came through even on a stem rub of the vegetative male plant. He was vigorous, sturdy, and a well-suited, well-proportioned match to compensate for the Peanut Butter Breath’s shortcomings.
In our first test run of the Brunch (PBB x Mimosa) progeny, we selected two keeper phenotypes: the Brunch F1 #5 and the Brunch F1 #8. They weren’t perfect, but they stood out as special to us for several reasons. They were dripping in trichomes, testing between 25-30% THC / 1-3% CBG, they had insane, dark purple coloring with a gorgeous yellow fade, and to our surprise and delight, a unique apple terpene profile was seeming to emerge. We knew there was still work to do–we needed to bulk her flower up, and we needed to tighten her internodal spacing–but this was now a much stronger palette to work from than what we’d had previously.
The Brunch F1 #5
The Brunch F1 #8
The Brunch S1 (Feminized Iteration)
In order to create our first release, we knew it’d be beneficial to feminize our work, and that would also give us the opportunity to take the first step toward locking in some of the features we loved in the male/female test stock. To do this, we took the Brunch F1 #5 and the Brunch F1 #8 and we crossed them and selfed them across several different breeding projects, testing the progeny of each to determine who was the strongest, and which genetics we would move forward with. When all was said and done, and all of the seed lots were tested, we selected two cuts to mother in order to breed the Brunch lineage further. These cuts were named the Brunch - Dark Horse Cut (#8 x #8 - #3) and the Brunch - Lover’s Cut (#5 x #8 - #5) (aka the Arugula Cut).
The Brunch 88 #3 - Dark Horse Cut
The Brunch 58 #5 - Lover’s Cut aka “Arugula Cut”
Breeding and feminizing our favorite phenotypes of the Brunch F1 created some drop dead gorgeous feminized Brunch S1 genetics. The coloration had darkened from purple to almost black, and the yield and morphology was beginning to trend in the right direction: Less stretch and more flower. It was very hard to choose our keeper cuts from these seed lots, but we realized that was a good problem to have. It was at that time that we decided that the Brunch S1 would become our first Dirty Bird Genetics - Volume 1 release. Exciting! You’ll still find these seeds on the Dirty Bird Genetics Volume 1 menu today (although I’ll warn you guys, when they sell out, they will almost certainly be gone for good). You’ll also find this s1/f1 iteration of the Brunch in many of our genetic family trees, including staff favorites:
Dirty Mimosa: A Brunch backcross and outdoor champion that clocks in with a lightening fast 43-47 day flowering time
Dirty Mimosa pictured outdoors in a local Maine garden.
Bad Apple: Probably my personal favorite Brunch-related strain, and a cultivar that has only continued to impress me more as we’ve bred with it. The Bad Apple has pungent terpenes that range from rotten Apple to gym sock funk, and our keeper “Sugar Mill” cut is the single most trichome-laden plant I’ve grown in my 15 year career. In 2026, this Brunch-child created two of my favorite strains we’ve bred to-date: Apple Peelz and Candy Apple Kush.
Bad Apple - Sugar Mill Cut (Day 42)
Apple Peelz (Day 49)
Candy Apple Kush (Day 44)
The Brunch F2
We knew early on that the Brunch was a project that we wanted to fully realize the potential of by creating a stabilized Brunch IBL (in-bred line). Now that we’d created and tested several iterations of the Brunch genetics, we were able to formulate a set of goals for the project:
Preserve Apple Terpene Profile: It’s unique to the Brunch and we love it.
Morphology: Shorten internodal spacing, select for lateral growth, preserve high calyx-to-leaf ratio, and retain a foliage volume that is ideal for air flow, light penetration, and outdoor cultivation.
Yield: Improve yield by selecting cuts that stack well, have dense flower, and yield respectably.
Flowering Time: Ideally, under 56 days.
Color: Preserve the dark purples and maroons that are signature to the Brunch.
Effect: Retain the social, happy effect that is signature to the Brunch.
Using the Brunch F1 #5 and a Brunch F1 male that we labeled #12, we made the Brunch F2. In cannabis breeding, the F2 filial generation is known to contain the largest number of phenotypes and the most genetic diversity of any other generation. We found this to be true with the Brunch F2. We saw divergence in color (purple/green), terpenes (apple/earthy meh), and in both flower and plant morphology. Speaking generally though, these plants grew much more laterally than their F1 counterparts thanks to our parental selections. We were also able to eliminate the “scraggly” phenotype that appeared in about 10% of our F1 seed population. These F2 plants had stronger, more bushy structure as a whole, accompanied by a higher volume of foliage, more compact, golf ball shaped flowers, and tighter internodal spacing.
After carefully watching our F2s grow, we whittled our selection down to two winning cuts that we would use for our F3 breed: The Brunch F2 #7 and #13. They each had something we loved, but neither had everything. The #7 had the most incredible, vibrant, apple terpene profile; there was something that smelled distinctly more “appley” about this plant than any we’d smelled previously, and we were confident this was the direction we wanted to go with the terpene profile. The #7 plant wasn’t perfect though: it stayed vividly green way longer than we would have liked, purpling in the final week of flower, long after we’d written it off as a green pheno. This was something we felt cautious about because color was one of the goals we’d set for the project. The #13, on the other hand, took on a beautiful, deep purple color early in flower–something we loved–but it lacked an exciting terpene profile, leaning more towards the subdued, nutty, earthy profile of the Peanutbutter Breath.
The Brunch F3
Brunch f3
V79 have better floral mass . Long intermodal spacing and classic brunch nugs, small leaves
139 #1 - Apple terps.
**V79 #1 - stacking the most - best floral mass. Striped maroon and purple and yellow leaves.
V79 _#2 - shorter but similar burgundy and purple and sugar/ apple terps
V79 #5- Apple gas Peanutbutter - very purple but not a great yield
Brunch 139
Biggest nugs yet. long and skinny and tie together up the stem
*3- Apple cheese. Tall. Long stacked buds. Very impressive stacking and yield - double floral mass of what we normally see, and very high calyx to leaf ratio
4- more arugula look. Apple smell.
When it came time to make our Brunch F3 seeds, we had a choice to make: We had to decide whether to breed our F2 #9 male with the wonderfully appley #7, or the spectacularly purple #13. This choice proved to be an impossible one, so we decided we would take the more intensive path and breed in both directions. Over the course of the next year, two Brunch F3 seed lots were created: The Brunch F3 v79 (made with our #9 male and our purple F2 #7 cut) and the Brunch F3 v139 (made with our #9 male the wonderfully appley F2 #13 mom).
In testing these two Brunch F3 lines we’d created, we saw the genetics take the most marked strides forward to-date. Most notably, the plants were stacking better than ever before, yields were improving, colors were popping (though continuing to diverge a bit between green, maroon and purple), and we were really starting to hone in on a consistent terpene profile. While the apple terpenes were predictably more dominant in the v79 seed population, we ultimately chose a cut from the v139 population to move the line forward to F4 (see pictured below). The Brunch F3 v139 #3 boasted the biggest colas we’d seen in a Brunch to-date. They were long, dense, and they tied together beautifully up the central stalk creating a long, beautiful arm of purple, funky, apple Brunch. The #3 cut had close to double the floral mass of any Brunch we’d seen before. It had an incredibly high calyx-to-leaf ratio, purple flowers, and its terpene profile was pungent and unmistakably apple. It checked all of the boxes, so the choice was a remarkably straight forward one.
Brunch F3 v139 #3
Brunch F3 v139 #3
The Brunch F4
In early 2026, we were able to test the Brunch F4s that we had made using only the F3 v139 #3 cut. This was the first time we had chosen to advance the Brunch line through a process called selfing (crossing a plant with itself through reversal). The v139 mother cut had so much to offer, and we were curious to see how this choice would evolve the line, so we created and tested our first population of feminized F4 seeds.
It has only been a month since we harvested our Brunch F4 test plants, and the project is still fresh in my mind. The F4s were easily the most exciting yet. The diversity we saw in the F4 generation was markedly different from what we’d seen previously. To use an analogy, imagine crossing a black lab with a poodle. The Brunch F2 + F3s were what I’ll call Bloodles; they were mutts. Their traits were messy and indistinguishable, resembling their parents in some ways while also blending together to form strange iterations of curly, black-and-white Bloodle soup. We saw countless combinations of traits–some that we liked and some that we didn’t–all unpredictably smooshed together. The F4 population was different. The traits we were selecting for were finally segregated in an easily observable way. Phenotypes were so much more identifiable. To circle back to our genius analogy: The Golden Doodle was born, alongside pups that looked remarkably black lab, and pups that looked remarkably Poodle.
While we did observe a little bit of inbreeding depression in our F4s–which is to be expected–overall the plants had several consistent qualities: They had an extremely short 50-day flowering time, a remarkably high calyx-to-leaf ratio, very compact, long, conical flowers, medium internodal spacing, 1.5x stretch, ideal foliage volume for air flow and light penetration, high trichome density, balanced vertical and lateral growth, and overall they were healthy, self-supporting, easy-to-grow plants.
One of the most interesting things about the Brunch F4 was that we finally saw a purely green phenotype emerge in 20% of the population. The 80% majority were purple: 50% solid, dark purple in both foliage and flower, and 30% predominantly purple with a little green fade. The terpenes were consistently apple-dominant–exactly what we wanted–and we were so excited to find that the apple smells were only deepening further, evolving into more of a complex, warm-yet-tart apple pie. For the first time, we did note some sour gas smells coming through on a slim minority of plants, with one plant exhibiting sour gas only; no apple.
The biggest obstacle we’ve faced in choosing our winning cut(s) of the Brunch F4s has been deciding what to do with the visual feast that is the green phenotype. We’d been very intentionally selecting for purple coloring from the outset of this multi-year project, and yet these green plants were hard to turn away from.
Thank you so much for reading about the journey we’ve gone on to create the Brunch, one of our most beloved plant-mothers. I’d like to wish all the mothers out there a very Happy Mother’s Day. Know that you are seen, loved, and celebrated every day!
Royal Queen Seeds shares 3 tips for new growers, and more! Don't miss out on all the great deals from Royal Queen Seeds for Breeder of the Week!
3 Tips For New Growers
Know Your Water Quality Water quality affects plant health. Test pH and EC regularly, especially with tap water. Poor sources may contain contaminants. Use simple kits if unsure, and filter, treat, or switch sources if needed.
Measure Your Environment Precisely Use sensors to track temperature, humidity, light, CO₂, pH, and EC. Human senses are unreliable. Accurate, calibrated measurements help you understand conditions and make better adjustments for consistent plant growth.
Inspect Plants Regularly and Thoroughly Check plants often to catch issues early. Inspect leaves, stems, and substrate for pests or disease. Regular scouting helps prevent small problems from becoming serious threats to your crop.
Favorite Breeding Project My favorite breeding project is a secret collaboration combining very different lineages. It will only proceed if both partners meet a strict “fire-only” standard, highlighting strong international cooperation and fully formed bridges between continents.
The F1 Hybrid program is another favorite, achieving photoperiod-quality in automatics with real consistency. It challenged my skepticism and showed me the value of staying open to change and innovation.
Story From The Garden
As a teenager in New Caledonia, I got lost for about 45 minutes in a huge guerrilla cannabis field while spotting the best plants. I had red tape and a flashlight, but the battery died, leaving me in near-total darkness, surrounded by thousands of plants. I kept whistling until my friends finally found me. Back to camp my hands were covered in fresh trichomes—some of the best charas I’ve ever had.
by Ben Morris, Head Breeder of Dirty Bird Genetics
Introduction:
There is a plethora of pests that plague our gardens, green houses, and grow spaces but few can compete with the rapidity and malignancy of the two-spotted spider mite (Tetranychus urticae). Two-spotted spider mites are small, herbivorous arachnids that feed on plant sap and chlorophyll by puncturing the underside of leaves with their tiny, piercing mouth parts called ‘chelicerae’.1 This feeding mechanism causes damage to the leaf which hinders the overall photosynthetic ability of the infested plant. These pests can reproduce rapidly and, if left untreated, can quickly lead to the deterioration, and ultimately, the death of an infected plant. The damage caused by two-spotted spider mites can lead to lower flower yields, seed abortion, and improper seed fill. This is a huge detriment for flower producers as well as for breeders and seed producers. These voracious little creatures are tiny (between 1/80th and 1/50th of an inch)2 and can be very difficult to detect before moderate to heavy infestation occurs. In the following sections, we will go through some of the visual signs growers can use to determine if they have a spider mite infestation and what approximate level that infestation is likely at (low, moderate, high).
Identification/Plant Signs:
As previously stated, two-spotted spider mites (TSM) are very small. Fully grown adult spider mites will appear as whitish to grayish-green specks with eight tiny legs and two dark spots on either side of their body. They are easy to mistake for small pieces of dirt of other, non-living debris but if you watch them long enough you will see them scurry about. They are largely found on the abaxial (underside) surface of leaves where they take advantage of any nooks and crannies they can find to hide and feed in. Having a hand magnifying glass or a jeweler’s loupe will make identifying these pests much easier than trying to observe them with your naked eye.
Early into infestation there are few signs of the two-spotted spider mite, the main indicator being the observation of the mites themselves. One can inspect a plant or clone they are obtaining using a jeweler’s loupe, or other hand magnification tool, to check under the leaves and on the stems for small whitish, gray/green bodies that often exhibit two large dark spots on both sides of the idiosoma3 (the main part of the body). One single female TSM can cause an infestation due to their rapid reproduction cycle and their ability to reproduce asexually. Thoroughly inspecting any incoming plants to your grow space is paramount in detecting pest issues. If there is a spider mite, or if there are multiple, inhabiting the plant’s aerial parts without any signs of insect feeding damage on the leaf and without webbing present, the plant is in the early stages of infestation.
As they feed, they pierce and damage leaf cells which ultimately leads to the desiccation and the eventual death of the cells they feed upon. This can eventually lead to the death of the entire leaf which obviously harms the plant. A sign of their feeding includes tiny, lightly colored dots that are observable on the adaxial surface (upper side) of leaves. These dots can appear whitish, yellow, or silver and give the leaf a mottled appearance. These damaged leaves can take on a yellow/gray or even bronze appearance as the damage spreads. If you see small, dotted patterns (also known as stippling) occurring on your leaves, check the underside of those leaves for the small, oval bodies of two-spotted spider mites.4
If the spider mites are left alone, they will continue to work their way up the plant, leaving visual indications via stippling/mottling on more leaves higher and higher into the canopy of the plant. Lower leaves, or leaves first infested, will begin to turn yellow and may start falling off. Eventually, when they reach a certain population size they will begin to make webs. These webs look just like spider webs and help the mites to protect themselves from predators as well as act as highways between plants for easier access to new feeding grounds.
Two-spotted spider mites focus on feeding and reproduction before they focus on making webs.5 This is good to know as it can help a grower determine what level of infestation they are dealing with. Below is a rough guide to determining the level of infestation and what action may be necessary. This rating scale was adapted from the work of Bruce Potter and Ken Ostlie6 (University of Minnestoa)
No Infestation: No spider mites nor plant injury observed.
Low Infestation: Minor stippling or mottling on lower leaves, no premature leaf yellowing observed
Low-Moderate Infestation: Stippling or mottling common on lower leaves; some premature yellowing observed
Moderate Infestation: Heavy stippling/mottling on lower leaves progressing into middle canopy; leaf yellowing and leaf loss observed; mites observed in middle and top canopy
Moderate-High Infestation: Lower leaf yellowing very apparent and leaf loss common; stippling/mottling, webbing, and mites common in middle canopy; mites and minor stippling/mottling in upper canopy
High Infestation: Lower leaf loss common and yellowing into middle canopy; stippling/mottling and distortion of upper leaves common; mites in upper canopy; webbing in upper canopy
Treatment:
The damage caused to leaves by two-spotted spider mites is not reversible2 so prevention, early detection, and treatment are of the utmost importance in ensuring your crop’s health and productive capacity.
There are many options available for treating spider mite infestations that largely reside within three categories: Physical, Chemical, and Biological.
Physical Controls:
Earlier into infestation a grower can use a hose or other means of spraying water with adequate pressure on the undersides of the leaves of their plant to physically knock the spider mites off of the undersides of the leaves. This method is not appropriate to use if mold is an issue in your grow space but can work for some growers in initially removing the mites. The drawback to this approach, besides a potential in increased mold presence, would be that mites not killed by being sprayed off could climb back up the plant and re-infest.
Some growers have had success in wiping their leaves down physically with a cloth and a small amount of insecticidal soap or oil. This can physically remove and crush mites and mite eggs but is time consuming and can lead to leaf damage if not done with care.
In early stages of infestation, removing heavily infested leaves and disposing of them immediately outside of your grow space can help to reduce the mite’s numbers as well.
Chemical Controls:
If the infestation becomes moderate or high, then chemical controls may have to be employed. Pyrethrins can be effective in killing mites but should be avoided due to the natural mite predators they also kill, which can lead to a TSM population resurgence.7 Pyrethrin should not be used during the mid to late flower stage of the cannabis growth cycle as it can be hard, if not impossible, to wash these chemicals from the flower/plant.8 Earlier in the flowering stage and/or during the vegetative stage pyrethrins can be somewhat effective in suppressing mite populations. Take care not to employ pyrethrins if you have adequate mite predators in and around your plants as these chemicals can also kill the beneficial insects, as previously stated.
Neem oil can also be used in a spray to knock adult mites off of leaves and the residue from the neem oil will suffocate the mite eggs, interrupting their life cycle and denying much of the next generation from being able to colonize and feed on your plants.4
There are organic chemical treatments that often employ some mixture of rosemary, clove, and mint oils to deter and repel mites. Many products are offered with these ingredients and can be used in foliar sprays as well as in the water the plants are fed to increase the amount of these substances in the soil and plant to further deter mites.9,10
Some growers have reported success with using a mix of isopropyl alcohol and water at a 1:9 ratio. This mixture can be used as a foliar spray to knock mites off the leaves and to also kill them. Isopropyl alcohol will also kill the mite eggs as well, attacking multiple generations of the mites at once. There are precautions to be taken if employing this method as isopropyl alcohol, if not diluted enough, can damage plant tissue as well. It also can dry leaves out if the temperature is high (80 degrees F and above). If employing this method it is best to test the spray on a few leaves first to see how the plant will respond before spraying the entire plant. It is recommended to spray near the end of the day to avoid the isopropyl alcohol sitting on the leaves and causing burning damage. While this method can be effective we do not recommend it unless no other options are available due to the risk of further plant damage but we wanted to include it as an option due to some positive reports from other growers.11
Insecticidal soaps can also be employed to kill and remove mites from plants. As with any insecticide, read the label that comes with the product and apply according to the manufacturer’s instructions to avoid any unnecessary plant damage.
Sucrose octonoate esters have been proven to be very effective in killing two-spotted spider mites, as well as other mite species and even aphids.12 One such product, Organishield, is made with these substances and, when applied as a foliar spray to the undersides of plant leaves, can kill juvenile and adult mites on contact by drying the waxy, protective cuticle that envelops them. Once this waxy cuticle is dried out it can lead to rapid dehydration and desiccation of the mites which leads to their death. Sucrose octonoate ester treatments are very environmentally friendly as they are non-toxic to humans, other animals such as pets, and they do not harm pollinators such as bees. Sucrose octonoate esters also have very low toxicity to aquatic life making them a very safe option for treatment. Sucrose octonoate esters also degrade rapidly (usually within 5 days) and only leave behind water, CO2, fatty acids, and sucrose so there is no lasting environmental impact such as with other, more toxic chemical treatments.
For light to moderate infestations a mix of 60ml Organishield per gallon of water, when applied in a foliar spray to the undersides of leaves, can be very effective in reducing the level of infestation and killing large numbers of mites. For heavier infestations a mix of 80ml Organishield per gallon of water is recommended by the manufacturer to lead to a faster kill on contact. After years of use we can personally vouch for this method of treatment as we have seen it to be very effective in reducing mite infestations while not harming our plants nor exposing our workers or the environment to toxic substances. As with any foliar spray treatment, remember to turn off grow lights during spraying to not potentially burn plants due to the magnification of light through water droplets.
Many of the substances discussed above will only act upon TSM nymphs and adults, not their eggs. We recommend applying another spray 3-7 days after the initial treatment to ensure the removal of newly hatched spider mites. For severe infestations, a treatment every 3-5 days (depending on insecticidal substance used; consult the manufacturer’s label) can be beneficial in continuously killing newly hatched two-spotted spider mites.
Biological Controls:
There are many biological and environmental (cultural) controls that can be employed in lieu of or in addition to physical and chemical treatments.
One common route is to employ predators of the two-spotted spider mite in your grow space. There are many species of insects and arachnids that predate on two-spotted spider mites and utilizing these species can be immensely helpful in combating mite infestation without the need for chemical treatment.
One such species, Phytoseiulus persimilis, is another kind of mite and a specialized hunter of two-spotted spider mites. P. persimilis can eat many adults and even more young two-spotted spider mites in a day. These can be purchased from several suppliers and then spread onto the infested plants. P. persimilis only eats two-spotted spider mites so they can be very effective in decimating TSM populations but will die off once their food source is depleted. These predatory mites are generally seen as good for rapid treatment when infestation levels are moderate to high.13
Neoseiulus californicus is another predator mite that has shown a decent effectiveness towards reducing spider mite populations. N.californicus has been reported to be hardier and able to survive hotter and drier temperatures than P. persimilis making it a good choice for growers with hot, dry grow area conditions. N. californicus can be used as a preventative measure as they have a wider range of prey they hunt and consume than just the two-spotted spider mite and thus may survive longer eating other pests in addition to TSM’s.13
Neoseiulus fallacis is a predatory mite that is more effective in cooler (50 – 800F), temperate climates and for outdoor grows as it has the ability to overwinter if enough food is present. By avoiding spraying chemical treatments and keeping N. fallacis populations alive and undisturbed some growers have been able to see this predator return the next year to continue hunting and eating two-spotted spider mites as well as other mite species and even some small arthropods.13
Ladybugs (of the family Coccinellidae and also known as lady-beetles) can also be used for mite control but aren’t the most effective at such a task due to their penchant for spreading out and away from grow areas as well as their preference for larger prey like aphids as opposed to two-spotted spider mites. However, there is a species of lady-beetle that is known as the “spider mite destroyer” scientifically named Stethorus punctillum that does hunt smaller insects and arachnids such as the two-spotted spider mite. These lady-beetles can also be applied to infested plants to hunt and reduce not only two-spotted spider mites, but a range of different mite species and even aphids. S. punctillum prefers spider mites for its diet but will eat aphids and mite eggs if juvenile/adult spider mites are not present making S. punctillum a good potential predator for integrated pest management. Unlike other, larger ladybug species, S. punctillum will not immediately disperse from the area as long as their food source is present making them good candidates for long term protection against plant pests, especially in green houses.14
The green lacewing (of the family Chrysopidae) is another species of insect that can be used effectively to treat spider mite and aphid infestations. While normally used more for aphid control, green lacewing larvae are voracious predators of smaller herbivorous insects and arachnids. Green lacewing larvae can be spread on the soil as well as on the leaves of a plant and left alone to hunt and eat many pests that threaten the health of your garden. If conditions are right (e.g. 68-900F temperatures, adequate pests for larvae to feed on, adequate flowering plants that produce nectar for adults to feed on) then a green lacewing population can be maintained throughout several growing seasons for lasting pest protection. Although the adult green lacewing is an herbivore it will not feed directly on cannabis plants and prefers nectars and pollen from flowering plants such as coriander, dill, or fennel, among others. Having any of these species as companion plants in your grow area can help to encourage lacewing population growth and can maintain their presence in your grow area.15
With any pest predators a grower should be careful about applying broad-spectrum insecticides as these can kill the beneficial insects you spent time and money on attracting and/or introducing to your grow space.
TSM Life Cycle/Prevention:
Two-spotted spider mites have 5 essential parts of their life cycle: Egg – Larvae- Protonymph- Deutonymph-Adult. Adult TSM’s usually live for 2-4 weeks and feed continuously on plant sap and chlorophyll from punctured leaf surfaces. Female TSM’s can lay anywhere from 2 – 20 eggs a day, with a rough average of 10-15 eggs laid a day in favorable conditions. Females will lay eggs regardless of whether male mites are present or not. Any unfertilized eggs will hatch as males, which will then fertilize the next batch of eggs to create more females.2,5 With this knowledge in mind, it is easy to see how even a single female TSM can start an outbreak that can take over your garden or grow space in very little time.
Two-spotted spider mites thrive in environmental conditions where it is hot, dusty, and dry. Between 68-860F, the spider mite life cycle can be completed in as little as 7-8 days, which means eggs have been laid-larva hatched-two nymph phases completed-and adult maturation achieved with another round of egg laying and fertilization occurring in about a week’s time. TSM’s optimal breeding and life cycle occurs also when relative humidity is less than 50%. 16
These temperature and humidity parameters can make environmental conditions difficult to balance as the low RH discourages mold and fungal growth but invites the presence of mites. The temperature range for optimal mite population growth also encompasses the temperature range for optimal cannabis growth (70-850F).
There are cultural controls that can be employed to reduce mite populations and breeding rates:
Make sure your plants are adequately watered. Drought stress invites mites to feed upon your plant so making sure it has enough water will aid in not attracting TSM’s to it. 4, 16
Raise the RH of your grow space to 60%. This will still allow for reduction and suppression of mold growth while slowing the breeding rates of mites at the same time.
Avoid over-fertilization with nitrogen, which can encourage the soft, succulent growth that attracts mites.17
Limit the amount of dust around your plants as dust can protect mites from predators. Using mulch to suppress dust in outdoor grows can be helpful. Sprinkler systems in outside grows can also help to reduce the amount of dust present on and around plants.
Keep your grow-spaces CLEAN. Remove leaf litter and other biological debris that could act as vectors for mold and hiding places for mites. Remove heavily infested leaves and discard them far from the grow area as soon as possible.
Reduce plant stress in any way you can. Stressed plants are much more susceptible to attack from mites, as well as many other pests. By keeping your plants healthy and happy you give them a better chance at not attracting mites in the first place.18
Feeding plants with potassium silicate can help to strengthen the cell walls of the plant, making it more difficult for mites, and other piercing insects, to puncture leaf and stem surfaces.19
Disclaimer:
This publication may contain pesticide recommendations that are subject to change at any time. These recommendations are provided only as a guide. It is always the pesticide applicator's responsibility, by law, to read and follow all current label directions for the specific pesticide being used. Due to ever-changing labels and product registrations, some of the recommendations given in this writing may no longer be legal by the time you read them. If any information in these recommendations disagrees with the label, the recommendation must be disregarded. No criticism is intended for products not mentioned. The author(s), Dirty Bird Genetics, and North Atlantic Seed Company assume no liability resulting from the use of these recommendations.
References:
1 Owens, D., Stubbs, C. (10/2024). Two Spotted Spider Mite. University of Delaware.
by Ben Morris, Head Breeder of Dirty Bird Genetics
Hop Latent Viroid (HLVd) is a highly infectious pathogen that consists of a single stranded loop of RNA.1 It is many times smaller than a typical virus and is actually a “Viroid.” It is also known as “dudding” or the “dudding disease.” HLVd was first discovered in Hops in 19872 and has since then been discovered in Cannabis.3 One study has shown that up to 90% of grow facilities in California have tested positive for HLVd at some point and that the infection has spread across cannabis in the US.8 Other sources have stated that up to 40% of flower from retailers and dispensaries in Canada have also had positive test results for the pathogen.6
HLVd has caused significant crop loss for Cannabis farmers in the form of lower yields (translating to a possible 33% loss financially across some state markets),8 lower trichome content, and reduced terpene profiles.3
HLVd is not only highly infectious but it remains hidden or dormant (latent) to observation until the cannabis plant experiences a secondary stress such as heat, over watering, pest infestation etc. that causes visual symptoms to occur.4
Sometimes HLVd can start showing symptoms during the flowering stage, even if not visually detectable during the entirety of the vegetative growth. It can cause the plant to develop small, abnormal (sometimes spiky), and less potent buds all over resulting in loss of yield and potency.3,8
Some infected cannabis plants never show symptoms throughout their entire lives and this is another reason why HLVd can be spread so easily as growers may sell or trade cuttings or clones with others and not have any suspicion that those pieces of plant material may be harboring the viroid.4 Improper sterilization of cutting tools and the reuse of gloves across different plants can quickly spread the viroid throughout your grow room as well.3,5
HLVd can exist in most of a plant’s tissues (stems, leaves, roots, etc.) but largely resides in the roots of cannabis plants. This does not mean leaves, stems, and buds are unaffected. The Viroid can take time to migrate through the entire plant as it enters the phloem (the vascular tissue responsible for conducting sugars and other metabolic products downward from the leaves) through a cut or tear in a stem or leaf, travels to the roots, and then spreads throughout the rest of the plant.6
Left: a young veg plant showing normal leaf distribution with common morphology. Right: An HLVd positive plant early in its vegging stage, showing clustering of new leaf growth and aberrant leaf morphology.
Symptoms
Shorter internodal spacing
Smaller leaves (sometimes with higher rates of chlorosis)
Stunting of bud size and morphology
Reduction of trichomes
Reduction of terpenes
Reduced overall plant vigor (weaker apical/main and lateral stalks)
How to Identify
As previously stated, visual observations of HLVd can include smaller buds with reduced trichome and terpene content during flower as well as abnormal leaf formation and stunted growth during all stages of a cannabis plant’s life. However, visual observations can occur too late after a grow has already invested significant time and money into flowering many plants which results in loss of crop and profit.
The most accurate way to assess the status of cannabis plants is through one of two processes known as Reverse Transcription PCR (RT-PCR) and Quantitative PCR (qPCr) which can be performed by many commercial labs across the US.3,9
Routine testing of mother plants, as well as any new clones or mothers introduced from outside your facility, is highly recommended. A schedule of up to 4 tests per nursery plant over a period of a month and a half has been suggested by one source.8 Another source has suggested isolating new plants for 30 days and testing on the third week of isolation.3 Regardless, testing is critical to ensuring the prevention and/or spread of existing HLVd in your grow facility.3,6
Left: A plant from the same pack of seeds at the same time in flower (week 7). Note the greater yield and more normal spacing on the leaves. This is closer to the normal presentation for this strain when uninfected by HLVd. Right: A plant late in flower (week 7) showing greatly reduced yield from the norm. Note the small bud size and the tight spacing on the clusters of leaves. Reduced yield and leaf bunching are two of the most common observable effects of HLVd or the ‘dudding virus.’
Transmission
HLVd is mainly spread by mechanical transmission.5,6 This refers to dirty cutting tools, unwashed hands, dirty gloves, and any other contaminated objects coming in contact with a plant’s tissue.
HLVd can also be spread through aqueous transmission (through water). For example, a non-infected clone can become infected if it is in the same cloner as an infected clone. Even if the two clones never have root-root contact, HLVd can move through the water from one infected plant to the roots of all the other clones in the same cloner. This also means plants that share drip trays or saucers could potentially end up infecting healthy plants when water run off from the bottom of an infected plant’s pot can mix with the roots and soil of the healthy plant.5,6
There are no published reports currently that show insect transmission of hop latent viroid in cannabis. However, many other viroids are spread by insects, making insect transmission of HLVd a high possibility. It is good practice to limit your cannabis plants exposure to bugs (best pest management practices, healthy plants, good environmental controls, etc.) as many other viruses and pathogens are spread by insects.7
Best Practices for Prevention
Isolate any new cuttings or established plants coming from outside of your facility. Make sure to test these plants before integrating them with the rest of your grow.
Change gloves when working with multiple plants. One pair of gloves per plant.
Clean cutting tools with at least a 10% solution of bleach that contains 5.25% sodium hypochlorite for at least 10 seconds in between taking cuttings from one plant to the next. Also clean any work surfaces that come in contact with plant material. 3,4,5 Isopropyl alcohol will not kill the viroid so bleach is required for efficient removal of HLVd from cutting/workstation surfaces.10
Avoid having plants share drip trays/saucers if possible (due to aqueous transmission).5,6
Destroy any plants that are infected or remove them from your grow to be treated for HLVd through tissue culture (only recommended if the cultivar is critical to your business due to time and financial cost of tissue culture).
Summary
HLVd can be a devastating issue for any grower whether it’s the home or commercial cultivator. HLVd can remain dormant for a long time and may never show symptoms while it spreads throughout a grow. Mechanical transmission through dirty/used cutting tools and gloves is the number one method of transmission of the viroid. Through routine testing, via RT-PCR or qPCR methods, and employing best practices in cleanliness all growers can limit the spread of this pernicious pathogen and get the quality flower we all love.
3: Adkar-Purushothama C.R., Sano T, Perreault J.P. (04 March 2023). Hop Latent Viroid: A Hidden Threat to the Cannabis Industry. MDPI. doi: 10.3390/v15030681. PMID: 36992390.https://www.ncbi.nlm.nih.gov/pmc/articles/PMC10053334/
9: Punja, Z K (2021). Emerging diseases of Cannabis sativa and sustainable management. Pest Management Science 01 February 2021. https://doi.org/10.1002/ps.6307
James Loud Genetics shares 3 tips for new growers and their top recommendations! Don't miss out on all the great deals from James Loud Genetics for Breeder of the Week!
3 Tips For New Growers
Start small and stay consistent Fewer plants mean less complexity and faster learning. Start with four to six plants max, and grow the same cross rather than mixing multiple varieties. This allows you to identify patterns in growth, nutrition, and structure, while also teaching you how individual plants express differently, even among sisters.
Genetics set the ceiling Start with proven, stable cultivars. Varieties with Blue Dream, LCG, Runtz, or Tangie lineage tend to be more forgiving and easier to manage, which builds confidence early. More finicky lines like OG Kush or Cookies can require multiple cycles to dial in and often frustrate beginners. Set yourself up for early success.
Follow one system and track everything Do not combine multiple sources of advice. Pick one approach and follow it precisely. Document your full process, and when making adjustments, change only one variable at a time. Track yield and quality, with quality as the primary metric. Real skill comes from repetition and problem solving over time, not guessing. Everyone starts somewhere, consistency is what separates average from exceptional.
Favorite Breeding Project
My favorite breeding work right now is my upcoming 420 release built around the Double Lemon Cherry crosses, along with several Runtz-based projects. What excites me about this work is the level of diversity I brought into it. I am incorporating a wide range of unique cultivars, including Dream Candy, RBK OG Kush, GMO, NL5 Haze, 24k, Chem91, Oregon Blueberry, and Bananaconda, to create new expressions of what is popular right now while still pushing things forward.
What makes this project stand out for me is not just the genetics, but the process. It is the first full run I have completed in Rockwool, where I was able to precisely steer the crop using Grodan’s Gro-Sense system. That level of control gave me a much deeper understanding of irrigation strategy, VPD, and dew point, and how those variables directly influence plant performance and final expression.
Story From The Garden
I’ve been doing this long enough to remember when charcoal filters weren’t standard. Back in 1997 to 1998, we were building our own with five gallon buckets and loose carbon.
The first run I ever did of Oregon Blueberry with those homemade filters barely smelled. I thought we had it figured out. Then came the next run, a Chemdog variety in my garage under six lights. The smell was overwhelming, completely uncontrollable. Neighbors over 200 feet away were convinced there was a skunk loose in the neighborhood. They kept asking me and my wife if we had seen it. We told them yes, of course.
We tried everything to manage it. Strong smelling companion plants, orange oil sprays, anything we could think of. Nothing worked. The plant just overpowered it all. Somehow, we got lucky and avoided any real issues, but at that time people were getting serious time for far less.
We were among the early wave of people with medical cards in California, but back then that card was not something you could rely on to protect you. You had to be sharp, resourceful, and a little lucky. That run taught me quickly that some varieties don’t just grow, they announce themselves whether you are ready or not.
Disclaimer: Cannabis seeds are sold as souvenirs, and collectibles only. They contain 0% THC. It is imperative that you check your state and local laws before attempting to purchase seeds, and we are not liable for what you do with seeds after receiving them. The statements on this website and its products have not been evaluated by the Food and Drug Administration. These products are not intended to diagnose, treat, cure or prevent any disease. Consult your doctor before use. North Atlantic Seed Company assumes no legal responsibility for your actions once the product is in your possession and is not liable for any resulting issues, legal or otherwise, that may arise.
Are you 21 or older?
You must be 21+ to enter this site.
Sorry, you must be 21 or older to enter this site.